Hey all, another demo update is just out, with UI and part behaviour improvements, plus a few bug fixes.
Release notes:-
Improved and added in-game UI overlays to show what actions are available to the player, and the keys bound to them.
Various other tweaks and improvements to UI textures and elements.
Implemented a gear engagement indicator.
Part behaviour actions now have primary and secondary key binding slots (and can use modifier keys).
Added configurable part behaviour settings for input smoothing and motor direction.
Controllable part behaviours can now be configured so that their bound keys either toggle activation on and off, or have to be held down to keep activated.
Enabled linear bearing attachments on gears.
Double clicking on a construction in the world tool UI will now select it.
Hey all, here’s an update on what I’ve been up to over the past several weeks. I’ve mostly been focused on providing more UI feedback for players in game, and improving part behaviour control.
UI overlays
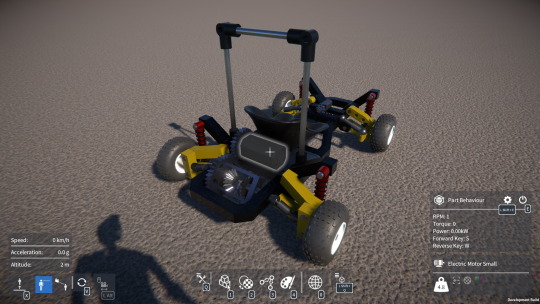
I’ve overhauled the in-game UI overlays to show the player what actions are available to them depending on the current context. These overlays show which keys are bound to these actions, so that they can always see what can be done at any given moment. I’m thinking this will replace the current text based hints, as it pretty much renders those redundant.
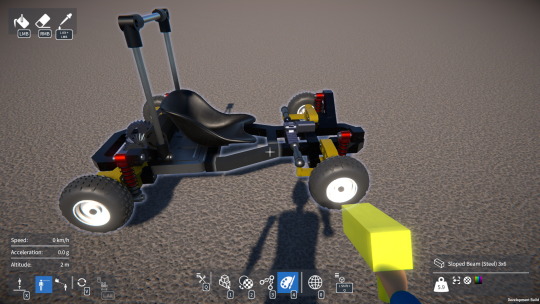
Below you can see the player overlay on the bottom left, the toolbar overlay in the middle, and the part overlay on the right. Each of these overlays have been modified to show various available actions and their key bindings.
The player overlay now shows the current camera mode and whether free flight is enabled. The toolbar overlay shows which keys to press for the tool and construction menus, and the part overlay now shows whether the part behaviour is active and which key to press for the part behaviour UI.
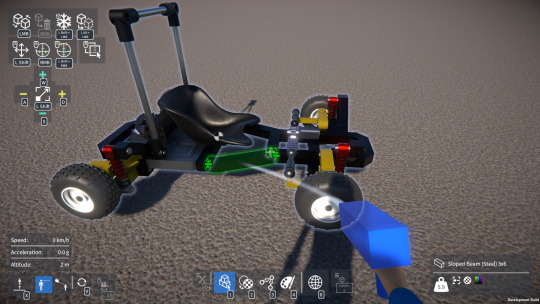
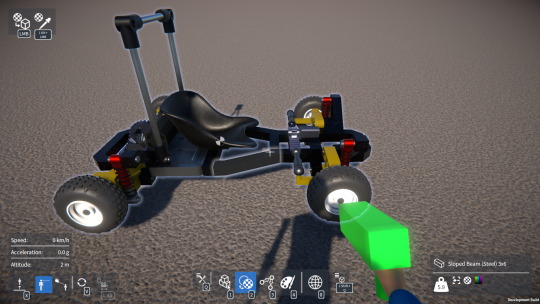
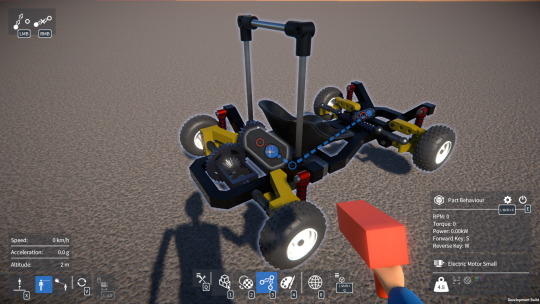
I’ve also added new overlays in the top left corner to show the available actions depending on which tool is active:-
My plan is that eventually the tool models themselves will also show additional status information, for example the painter tool will show the currently selected paint colour.
Gear engagement indicator
While attaching gears and trying to align them so that they’re engaged, it’s not always totally clear whether the game thinks they’re actually engaged or not, at least until the construction is unfrozen and the player perhaps finds that things aren’t working the way they expected.
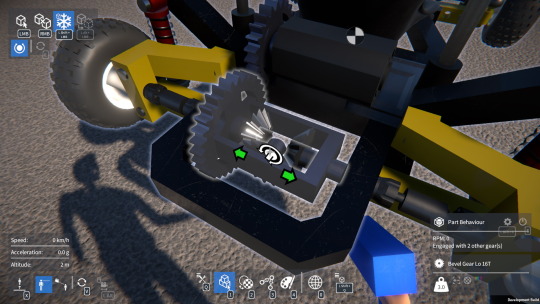
So I’ve implemented a gear engagement indicator – when a gear is highlighted, arrows point to the other gear(s) it’s currently engaged with. Here’s an example where the idler bevel gear in a differential is highlighted, showing the other two bevel gears it’s engaged with:
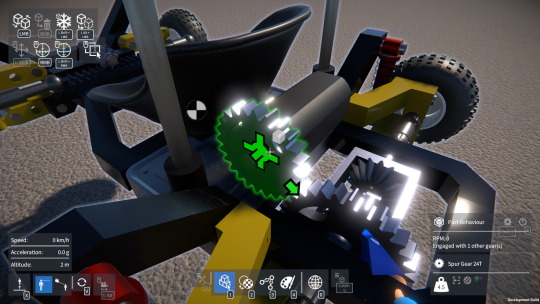
It also works while aligning a gear during construction, so that the player knows what to expect once they attach it:
Part behaviour improvements
I’ve unified the way key bindings work between the actions you can configure in the controls options screen and those in the part behaviour UI. This allows part behaviours to now use modifier keys, and to have a secondary key binding.
Controllable part behaviours can now be configured so that their bound keys either toggle activation on and off, or have to be held down to keep the behaviour activated.
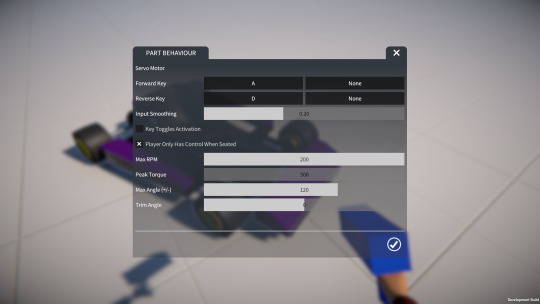
I added a parameter to controllable part behaviours to configure input smoothing. When smoothing is set to a higher value, input is less responsive but it’s easier to hold it at a roughly constant value by tapping the key. Conversely, when smoothing is set to a lower value, control is more immediate and responsive.
This can be really useful when using servos for vehicle steering for example. Increasing the servo’s maximum RPM while also increasing input smoothing provides responsive but still nicely controllable steering:
Finally, I also added a parameter to the electric motor part behaviour to invert the motor’s direction. This works regardless of whether keys are bound to control the motor or not, but obviously is particularly useful when they’re not.
I’m planning on releasing a demo update with these changes soon, so keep an eye out for that!
Posted on
Discord build contest Aug 22nd – Sept 6th
Theme: Build a construction vehicle.
Thanks for your awesome builds everyone, and congrats to the winners!
Greetings all, I think it’s time for an update on what’s been happening for the past few weeks! I got back up and running on a newly built PC after the old one gave up the ghost, and I’ve been working on task management stuff, making various improvements to the game, and fixing bugs.
Trello
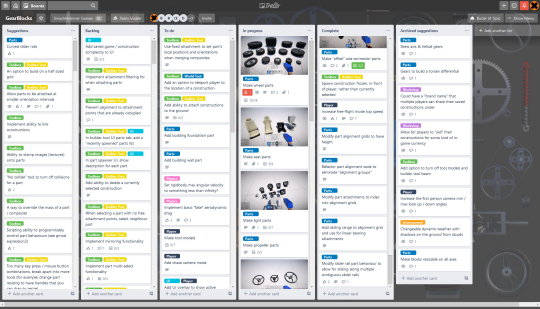
During the down time while waiting for parts to arrive for my new PC, I couldn’t make much development progress, so I took the opportunity to get set up on Trello for task tracking. All of my tasks are on there now, as well as feature requests and suggestions from the GearBlocks community. Many of the tasks still need fleshing out more and perhaps breaking up into sub-tasks, but it’s a decent start.
The great thing about Trello is that it gives people the opportunity to comment and vote on tasks. Currently it’s set up as invite only, so if you’d like access, email me at: sam@gearblocksgame.com
Part alignments
I’ve been making improvements to how part alignment works, specifically how alignment positions & orientations are defined and processed.
Previously, a part’s alignment grids could be specified from a local origin + width & depth values, saving the need to specify each alignment point individually. Now, these grids have been extended to optionally have a height value, allowing for alignment “columns” to be more compactly represented (useful for axles for example).
Also, the alignment grid setup and search code has now been refactored to be simpler, easier to debug, and easier to extend.
All this was a prelude to the main change, which was to make part attachments (fixed, rotary bearing, etc.) refer to the alignment grids that they were created from. An attachment now gets its orientation and allowed attachment types directly from the alignment grid, saving the need to store them separately. The main reason for doing all this though was to address a problem with linear bearings which I’ll come to in a moment, but having access to the alignment grids this way has other advantages too, for example it allows for retrieving the alignment type when displaying attachment indicators (e.g. surface vs. interior could be shown differently). This is something I’ll hopefully get to make use of in the future.
As attachments now index into their source alignment grids, I had to change the save format to store these indices. I’ve implemented code to convert old saved games / constructions upon load so that their attachments reference valid alignment grids.
Sliding distances
When setting up the physics constraint for a linear bearing attachment, a sliding distance and anchor offset need to be calculated. Previously this was done by simply using the bounds of the part, i.e. its outer dimension along the sliding direction. However this only works for simple “convex” parts (e.g. blocks and axles), for anything more complex, the sliding distance may need to be less than the size of its bounds.
So to solve this, the sliding distance and offset for a linear bearing attachment is now calculated based on the dimensions of its source alignment grids, which it has access to due to the changes I mentioned earlier.
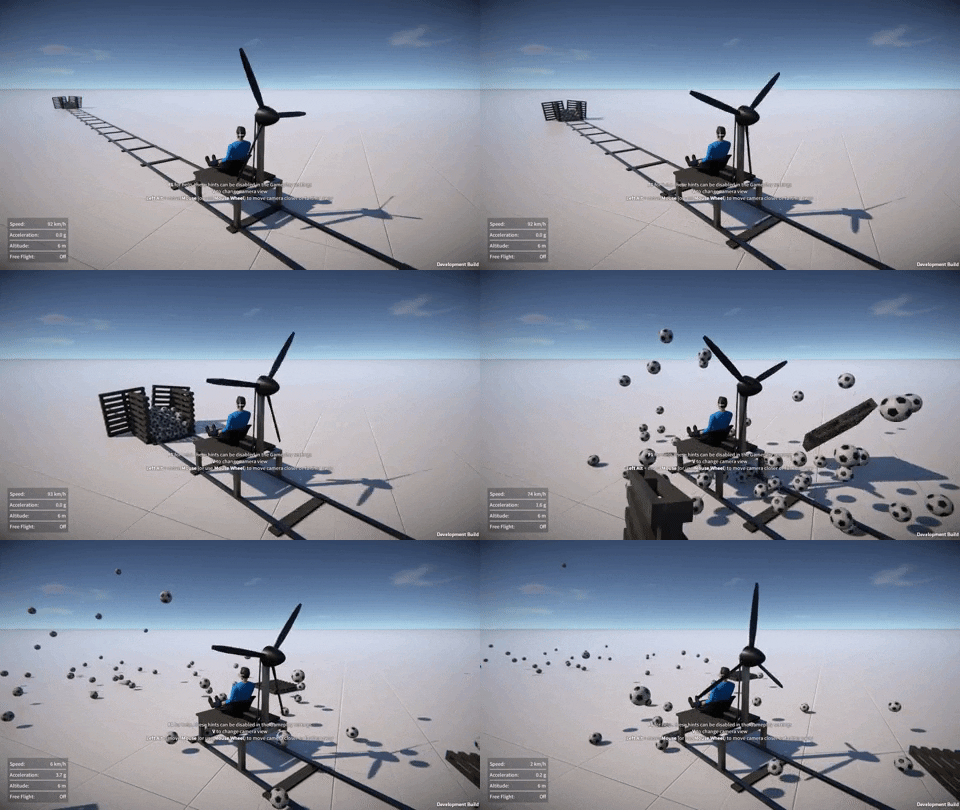
The slider rail parts are limited to 25 units in length, I don’t want to make them any bigger than this as I think it would be rather unmanageable to build with. However, it seems reasonable to be able to create effectively longer slider rails by placing them end-to-end, so I made some modifications to allow parts to appear to slide from one rail to another. To do this, I implemented code in the slider rail part behaviour to find its adjacent neighbours, and then calculate a new total sliding distance and offset for any linear bearing attachments associated with it.
Here’s an example of this in action:-
Other stuff
I’ve also been working on some other improvements. For example, constructions are now spawned frozen and positioned on the ground in front of the player. Previously one of the parts in the construction would have been selected by the player after spawning, resulting in the construction potentially being oriented weirdly, poking through the ground, player, etc. This made spawning constructions awkward and confusing, and I think the new way is a lot better.
Player character free flight movement has been modified to have different acceleration and a higher top speed when holding shift. This helps to quickly navigate larger distances around the map.
All of this, plus various bug fixes will be in the next demo update, which I’m hoping to release very soon!
Hey everyone, I’ve just released a demo update with all the UI and workshop improvements that I discussed in the previous blog post, along with several bug fixes, enjoy!
Release notes:-
Improved UI textures, colours, and elements to make the UI more legible and easier to use.
Improved the general appearance and layout of all the UI menus and screens.
Selection lists of saved games / constructions are no longer refreshed
every time UI screens are opened, only when something has changed.
Improved Workshop browser screen, including search functionality, various sorting & filtering options, and voting.
In saved game / construction UI screens, shown saves can now be filtered by their tags.
Added UI support for publishing saved games to the Workshop, and for loading downloaded games.
Saved game / construction tags are now forced to be all lowercase, in order to match Steam Workshop.
Double clicking on a saved game / construction will now load / spawn it.
User now asked to confirm before overwriting an existing saved game / construction.
Esc. key now backs out of in-game GUIs.
Added a “Steam Workshop agreement” popup UI that is shown after publishing an item when the player needs to agree to it.
Increased LOD transition / draw distances for parts.
Hey everyone, it’s been a while, so here’s a brief update on what I’ve been working on over the past month or so!
Save / load UI improvements
I’ve made quite a few improvements to the UI screens used for saving / loading games or constructions.
Now, rather than repopulating the list of saves whenever the screen is opened, they are only updated if something has actually changed (e.g. file saved or deleted). This makes it more responsive and means the scroll position doesn’t keep getting reset.
I’ve also implemented some features to help manage and organise a larger number of saves more easily. Each save screen now has a list of tags (populated from those currently in all the saves), which can be selected from to filter out which saves are shown. In addition, locally saved, Workshop downloaded, and built-in example saves are now separated into their own panels that can be switched between.
The player now has to confirm before saving over an already existing saved game or construction (just like when deleting a save).
Double clicking on a saved game or construction now loads / spawns it, without having to click on a button. Similarly, double clicking on a map in the “creative mode” screen will start a new game with that map.
UI appearance
I also spent a lot of time tweaking the layout of the UI screens and improving the various UI elements. My aim was to improve the overall UI appearance, make better use of space, and (most importantly) improve legibility.
The UI could still be way better of course, and there are many more things I would like to do, but I think it has been a good step in the right direction.
Workshop integration
Finally, the other area I’ve been working on is extending and improving the Steam Workshop support in the game.
In the Workshop browser screen, there are now a whole host of searching, sorting, and filtering options. The player can search with a text string (matches against the text in item names and descriptions), or they can search using tags (matching against any or all specified). Results can be sorted by popularity, recently added, etc. and filtered by items subscribed to, published, etc. Speaking of popularity, I also added buttons for voting items up and down.
This was all implemented using Steamworks functionality, so it was pretty easy to do really, the main challenge was more on the UI side of things.
Lastly, I’ve also added support to the load game screen for publishing saved games, and for loading games downloaded from the Workshop!
Hardware fail
On Monday my PC completely died (reboots every few seconds), narrowed it down to either the CPU or motherboard. It’s a fairly old machine, so at this point it probably makes most sense to build a new PC.
Anyway, I’m currently resorting to using my old laptop, which is a major setback to progress as it makes development painfully slow. I was hoping to release a demo update soon with all the UI and Workshop improvements, but this will probably be delayed for a while now unfortunately.
Posted on
Discord build contest for the Steam Game Festival week: June 16th – 22nd
Theme: Build a walking vehicle.
The creations for this one were amazing, well done to everyone who entered!
The Steam store page is now live, with the latest demo available to download with Workshop integration and more. Check it out, and don’t forget to add the game to your wishlist!
NOTE: To load your old saved games / constructions in the new Steam demo, first make sure you load them in the previous demo version (0.5.7362) and save them back out to convert them to the new save format.
Phew, it’s been a busy time lately! I decided it would be a good opportunity to take part in the upcoming Steam Game Festival from June 9th to 14th, so for the past few weeks I’ve been working towards getting ready for that, and there’s still a lot more to do.
I’m excited that soon the GearBlocks store page will be live on Steam, and a new updated demo build will be playable there during the festival!
Saved game changes
The first thing to mention is that I’ve removed support for the legacy save format, which means that saved games / constructions from demo builds prior to the most recent version (0.5.7362) will no longer load. You can still convert older saves into the new format by loading them into demo version 0.5.7362 and saving them back out.
I have also changed the saved game / construction folder structure slightly, so that all files for each save are now held in their own sub-folder (existing saves are converted over to this new folder structure). Also, each save now has an additional meta data file (for name, description, and tags).
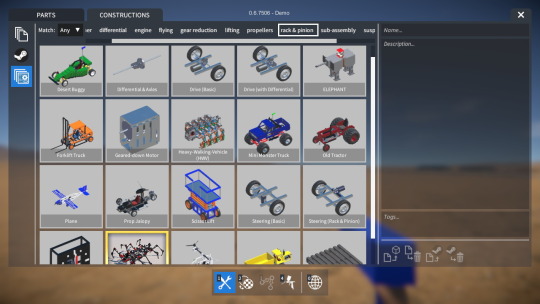
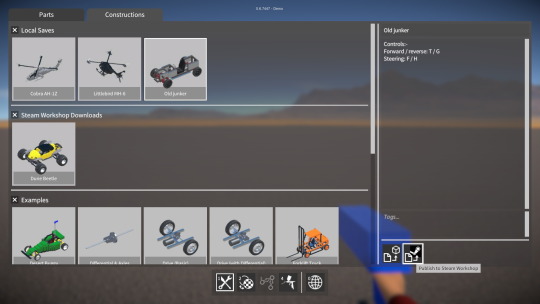
I’ve modified all the save / load UI screens to allow the name, description, etc. to be entered / viewed when saving or loading, for example:-
All this was necessary for the next step…
Steamworks integration
Given that the GearBlocks demo will soon be up on Steam, I really wanted to take advantage of the platform from the get go, and utilise Steam Workshop in some way.
The first step was to get Steamworks integrated and initialised. I’m using the excellent Facepunch Steamworks .NET implementation (https://github.com/Facepunch/Facepunch.Steamworks), which seems to support everything I need, and I found it to be really easy to use!
Next I implemented code for publishing saved constructions to the Workshop, and spawning subscribed (and downloaded) constructions, also modifying the construction spawner UI to support these operations:-
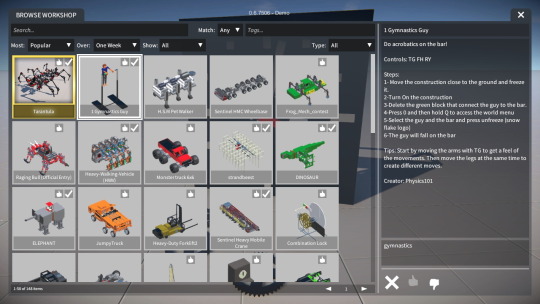
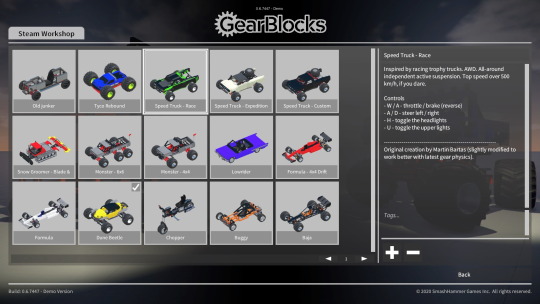
Finally, I built a basic browser screen to query and view all items currently uploaded to Steam Workshop, and to allow you to subscribe / unsubscribe to them:-
There’s a lot more work left to do for this screen, e.g. query sorting and filtering options, up / down voting of items, etc. but this has the bare bones functionality for now.
Also I plan on adding Workshop support for saved games, which should be relatively quick to do now, saved games already have meta data so they’re basically good to go.
Steam store page
Before the festival starts, I also need to get my store page ready for prime time, as this will link to the demo and give people an opportunity to wish-list the game. I still have plenty more work to do on this, but I’ve done most of the graphical assets now. I’m not going to reveal any of these just yet, but you may have already noticed the new and improved logo!