UI and part behaviour improvements

Hey all, here’s an update on what I’ve been up to over the past several weeks.  I’ve mostly been focused on providing more UI feedback for players in game, and improving part behaviour control.

UI overlays

I’ve overhauled the in-game UI overlays to show the player what actions are available to them depending on the current context.  These overlays show which keys are bound to these actions, so that they can always see what can be done at any given moment.  I’m thinking this will replace the current text based hints, as it pretty much renders those redundant.

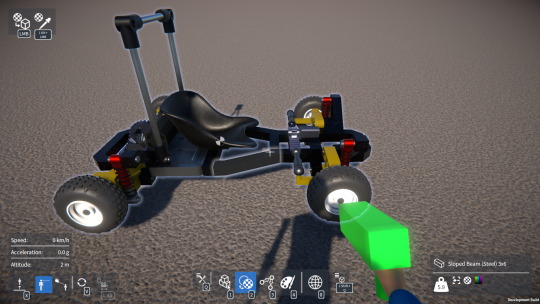
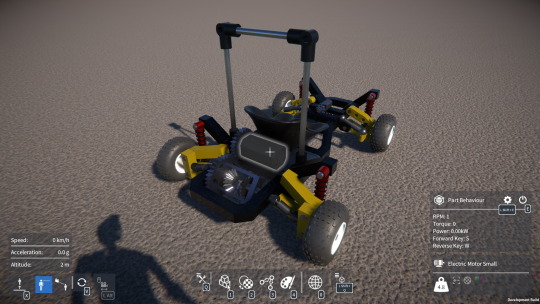
Below you can see the player overlay on the bottom left, the toolbar overlay in the middle, and the part overlay on the right.  Each of these overlays have been modified to show various available actions and their key bindings.
image

The player overlay now shows the current camera mode and whether free flight is enabled.  The toolbar overlay shows which keys to press for the tool and construction menus, and the part overlay now shows whether the part behaviour is active and which key to press for the part behaviour UI.

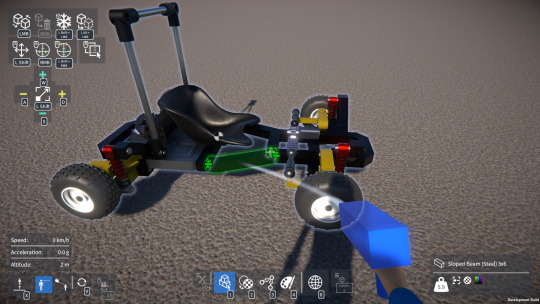
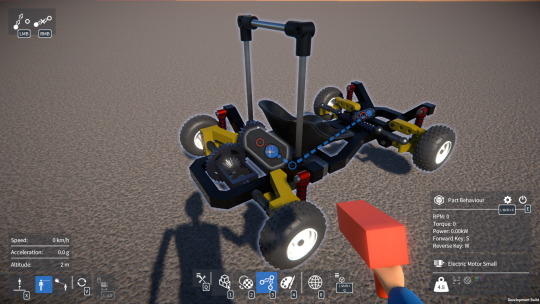
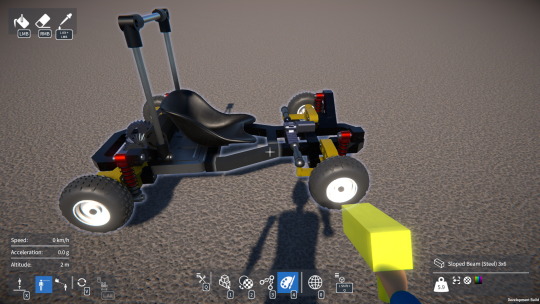
I’ve also added new overlays in the top left corner to show the available actions depending on which tool is active:-

Selection overlay (for select, delete, attach, detach, etc.) and transform overlay (for translate, rotate, resize, etc.):
image

Material overlay (apply and pick):

image

Link overlay (add / remove, and delete all):
image

Paint overlay (apply, remove and pick):
image

My plan is that eventually the tool models themselves will also show additional status information, for example the painter tool will show the currently selected paint colour.

Gear engagement indicator

While attaching gears and trying to align them so that they’re engaged, it’s not always totally clear whether the game thinks they’re actually engaged or not, at least until the construction is unfrozen and the player perhaps finds that things aren’t working the way they expected.

So I’ve implemented a gear engagement indicator – when a gear is highlighted, arrows point to the other gear(s) it’s currently engaged with.  Here’s an example where the idler bevel gear in a differential is highlighted, showing the other two bevel gears it’s engaged with:
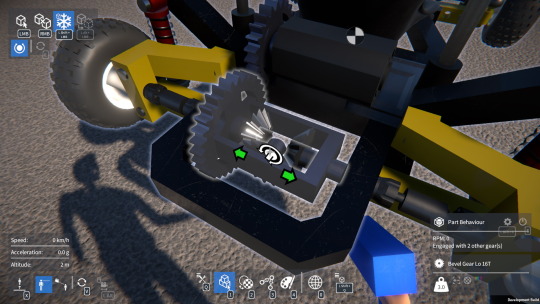
image

It also works while aligning a gear during construction, so that the player knows what to expect once they attach it:
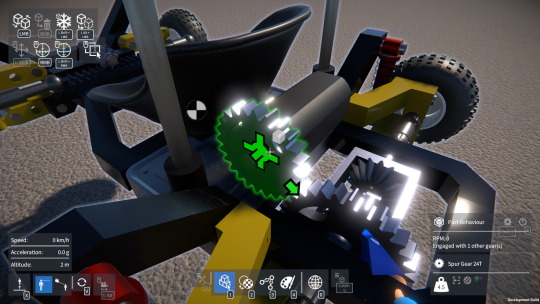
image

Part behaviour improvements

I’ve unified the way key bindings work between the actions you can configure in the controls options screen and those in the part behaviour UI.  This allows part behaviours to now use modifier keys, and to have a secondary key binding.

Controllable part behaviours can now be configured so that their bound keys either toggle activation on and off, or have to be held down to keep the behaviour activated.

I added a parameter to controllable part behaviours to configure input smoothing.  When smoothing is set to a higher value, input is less responsive but it’s easier to hold it at a roughly constant value by tapping the key.  Conversely, when smoothing is set to a lower value, control is more immediate and responsive.

This can be really useful when using servos for vehicle steering for example.  Increasing the servo’s maximum RPM while also increasing input smoothing provides responsive but still nicely controllable steering:
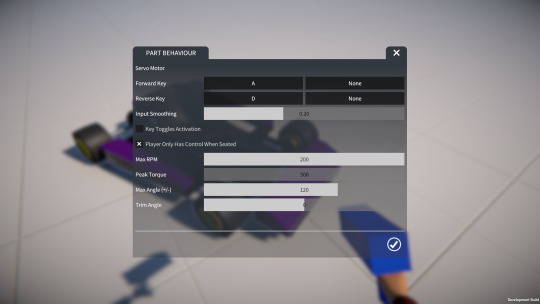
image

Finally, I also added a parameter to the electric motor part behaviour to invert the motor’s direction.  This works regardless of whether keys are bound to control the motor or not, but obviously is particularly useful when they’re not.

I’m planning on releasing a demo update with these changes soon, so keep an eye out for that!
GearBlocks Demo 0.5.7362

GearBlocks Demo 0.5.7362

Debug console

Over the weekend I implemented a debug console in the game, something I’ve been wanting to do for ages.  It shows logging output, and it can be used to inspect / modify variables, and trigger events in the game.

This was pretty simple to do, because the “global” variables and events were already implemented as ScriptableObject assets (see ScriptableObjects For Fun and Profit for details).  It was just a matter of making them automatically add themselves to a list to then be accessible in the console.  Almost as if I’d planned it that way from the beginning!

These existing variables and events are used by the various systems in the game, and don’t all necessarily make sense to mess with in the console, but many can be useful for testing purposes, or simply for playing around under the hood.  I did add a couple of extra variables just for fun though, one to modify gravity, and another to change the time scale (slow-mo / fast forward).

The console itself has a simple UI, just scrolling text with a box to input commands at the bottom.

image

There are a few different available commands, for example to do things like listing the available variables or events, or to get help on using the console.Typing a variable’s name will shows its current value, or typing its name followed by a value will modify it.  Typing an event’s name (followed by arguments if required) will raise that event, which can cause things to happen in the game (depending on the game’s current state).

GearBlocks building UI – need your feedback!

One of the main core elements of GearBlocks is the building game mechanic, and it’s an area I’m still not really happy with.  I think the builder tool user interface is too clunky and awkward to use, and it presents too steep a learning curve to new players.  However I’ve struggled to think of how to simplify the UI without losing the flexibility of the current system.

So I decided to go back to basics and just look at the way that parts are positioned and orientated to be aligned together.  For now I’m ignoring part resizing, which I think it might be best to separate out into another tool anyway.

In this video I show what I think are some of the problems with the current system, and demo a quick and dirty prototype of a possible alternative.

I’d love to know what you guys think.

  • How hard was it for you to learn how to build stuff in the game when you first started?
  • Do think the current builder tool is basically OK as it is, should I just leave things as they are and get on with finishing the rest of the game?
  • Or do you find the current building user interface difficult to use?
  • Do you think the approach that I’ve shown here in this prototype is worth pursuing?

Let me know in the video comments, or on the GearBlocks discord.  Thank you, and happy holidays!

Join the GearBlocks Discord Server!

Join the GearBlocks Discord Server!

Character customisation

Over the past few weeks I’ve been finishing up the player character work I started a while back, along with some code refactoring and other things.

Building a player character

I’ve now implemented functionality so that a construction built out of body parts can be treated as a player character model.  Such a “character construction” differs from a normal construction as follows:-

  • It doesn’t get serialized out to saved games, because the player’s character construction gets spawned separately (based on what was selected in the character screen, see below).
  • It doesn’t collide with other non-character constructions or objects in the world (the player’s CharacterController takes care of collisions).
  • It can’t be selected, frozen, or destroyed.
  • Body parts in it don’t move via physics, instead they are locked to the appropriate animated bone (e.g. head, upper arm, lower leg, etc.)

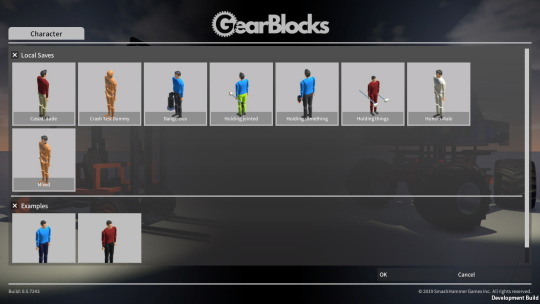
I added a new character screen accessible from the main menu.  This allows the user to select a character construction, which will then be spawned as the player character when entering a game.

image

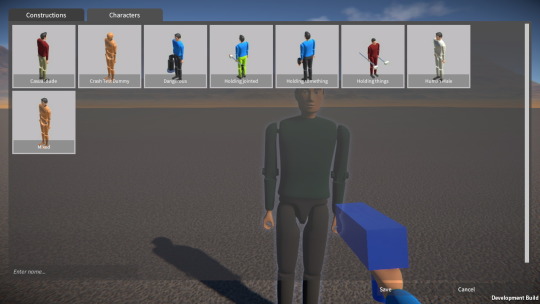
To create a custom character, first the user assembles a construction as normal out of body parts, and then they save it via the save construction screen.  As shown below, I added a tab to this screen to allow a construction to be saved as a character so that it’ll then appear in the character screen and be available for selection.

image

To switch to the new character, the user then has to exit back to the main menu, go into the character screen and select the one they just saved, before re-entering a game.

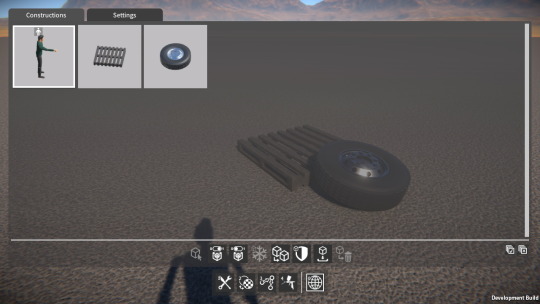
In game, the character construction can be seen in the world tool UI just like any other construction.  However there are some operations that can’t be performed on it as mentioned before: select, freeze, or destroy.  This can be seen below, note that the character construction has an icon to identify it as such.

image

This pretty much completes the player character system although, as always, there are a few loose ends to tie up:-

  • I need to add checks to ensure that the construction is valid to be a character (e.g. has the correct body parts, and they are connected together appropriately).
  • Currently, to change the player character construction the user has to exit back to the main menu, I’d like to implement a way to swap it during game play.
  • The body part meshes need a bit more modelling work.
  • I’d like to add more attachment points to the body parts to allow for more customisation options.
  • I also want to add more body part variants and accessories.

Free flight mode

I’ve also finished working on a “free flight” mode for the player.  This turns off gravity for the player and changes the controls slightly so that the user can fly up and hover in the air, handy for when building large constructions!

Singleton squashing

Finally, I also did another code refactoring pass to eliminate the remaining singleton MonoBehaviours in the game (well nearly).  This primarily involved converting them to ScriptableObject assets, and replacing any public method calls with events and handlers.  I covered this topic in the ScriptableObjects For Fun and Profit blog post a while back, so I won’t go into detail here.  Suffice to say I’m done with this refactoring process now, there are only a couple of singleton MonoBehaviours left, which are for my networking abstraction layer (something I also blogged about a while ago), and I think I’m just gonna leave these as they are.

Saved game serialization

Well, seems like another two months has gone by in a flash!  I was away visiting family for some of this time, and the work I’ve been doing on the game has resulted in a frustrating lack of progress to show for it, but here’s an update on what I’ve been up to anyway.

Saved game serialization

Up until now, saved games and constructions have been serialized via a binary stream, with no formatting, just using BinaryReader and BinaryWriter directly.  This is fast and results in a compact file size, but has one huge disadvantage, a lack of version tolerance.  In other words, if I add or remove any variables to be saved, or reorder them, then old saved game files will no longer load correctly.  To work around this I wrote code to check a version number in the saved file, and then convert things over for each added or removed variable.  This is a hack really, and has resulted in rather messy and hard to maintain code.

This situation is bad enough with just the demo version of the game out there, with a cut down feature set.  Maintaining saved game backwards compatibility will only get harder once the full version is released.

Ideally, I need a properly structured save file format, with some kind of key value pairing that would allow for version tolerance, but wouldn’t bloat the file size too much.

BinaryFormatter

First I investigated using BinaryFormatter, because it allows for version tolerance via optional fields, but I couldn’t get it to work when deserializing MonoBehaviour classes.  I need to be able to instantiate the MonoBehaviour and then populate serialized values into it, not have the deserialization process itself try and allocate a new MonoBehaviour (which is not allowed by Unity).  I thought maybe using a serialization surrogate might allow for this, but couldn’t figure out a way to make it work.  The other downside of BinaryFormatter is all the assembly and type data it saves out adds quite a bit to the file size.

Json serialization

So after looking around for other possible solutions, I decided to try Json.  This provides the key value pairs I need in a fairly compact structured format.  I used Json.NET from Newtonsoft (provided via a Unity asset store package for ease of integration) which seemed really promising, it’s very easy to use and highly configurable.  In most cases there’s very little additional code to write, you can just use the JsonProperty attribute to specify which class properties to serialize, and configure how they’re serialized.  Also, it allows for populating properties of a MonoBehaviour that has already been allocated, by using JsonSerializer.Populate() inside a JsonConverter.

Still, it took me several weeks to get Json serialization working for both saved constructions and full saved games, there were a few stumbling blocks along the way which took time to work around, as did just learning how to best use the Json.NET API.  The end result seemed great though, it solved the version tolerance problem, and the code was so much simpler and cleaner.

One issue was that the resulting file sizes of the text based Json format were huge.  Given that the game uses the same serialization code path to send construction data between networked players, this was a problem.  So, I switched over to using Bson (the binary equivalent to Json), and also compressed the data via a DeflateStream.  This worked well, the resulting file sizes actually ending up smaller than my original binary stream format.

Performance and memory problems

At this point I thought I was good to go, but then I started profiling the Json serialization with large saved game files (more than a thousand parts), and realized I was in trouble.  Firstly, deserializing the saved game was more than twice as slow using Json vs. the old binary stream method.  This wasn’t a complete disaster as the load times weren’t terribly long in the first place.  The other more serious issue was that the Json deserialization did an enormous number of tiny GC allocations (as in millions of allocs, totalling hundreds of MB!).

I found that reducing the JsonProperty name lengths helped slightly with this but not to any significant degree.  I spent quite a lot of time restructuring the code that loads the various modules in the game (player, constructions, time of day, etc.) to try and deserialize from the file stream more efficiently, but this made very little difference to performance or memory usage unfortunately (the resulting code was cleaner than before though so I guess the refactoring was worth doing anyway).

I’m annoyed with myself that I didn’t do enough tests to pick up on these problems before putting all the effort in to convert the game over to use Json.  If I’d known ahead of time, I probably wouldn’t have bothered.

So now I’m not sure what to do.  If I stick with the old binary stream solution, then all the Json serialization effort will have been wasted and I’m still stuck with difficult to maintain code for backwards compatibility.  But the Json serialization option as it stands isn’t acceptable, I’d need to do something to resolve the memory and performance issues.  One possibility would be to manually serialize everything (i.e. use JsonReader / JsonWriter directly rather than JsonSerializer), supposedly this is the fastest way as it avoids overhead from reflection and so on.

I’ve decided for now to put all this to one side, think about it some more, and come back to it later.  In the meantime I really need to get back to trying to make some positive progress with the rest of the game!

Player animations

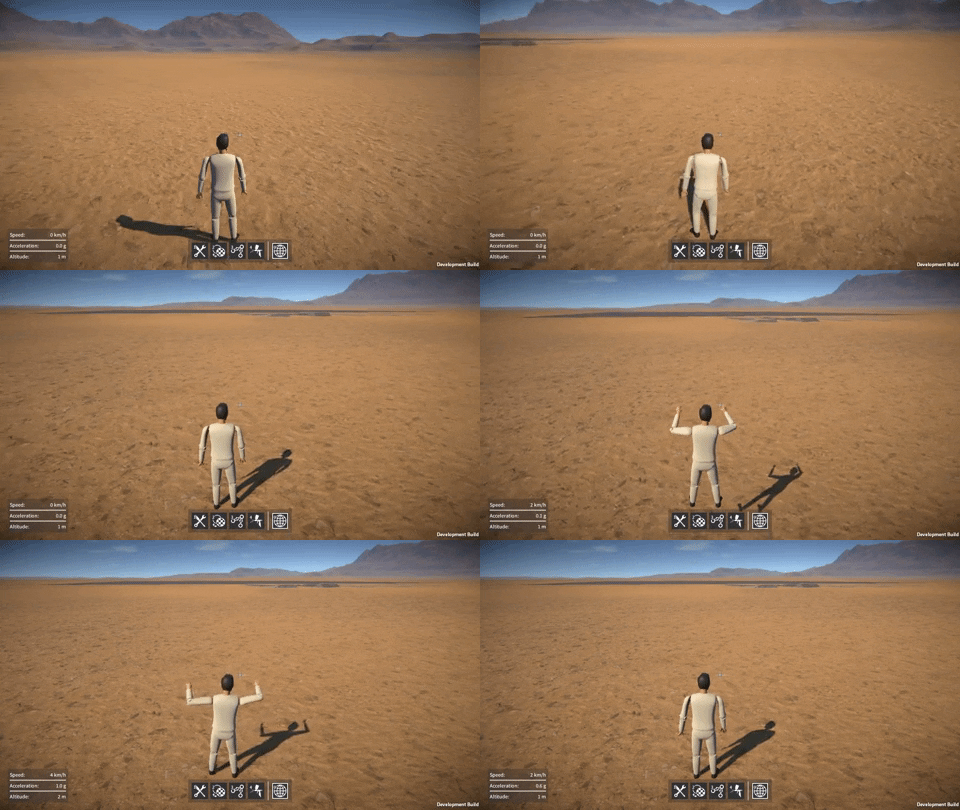
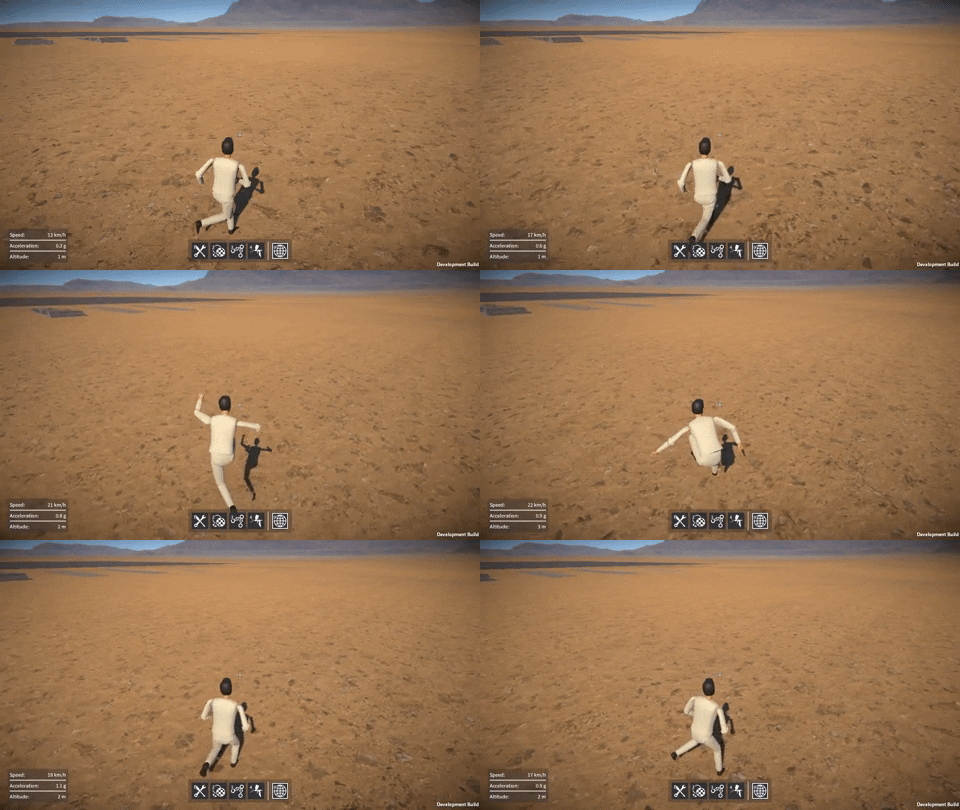
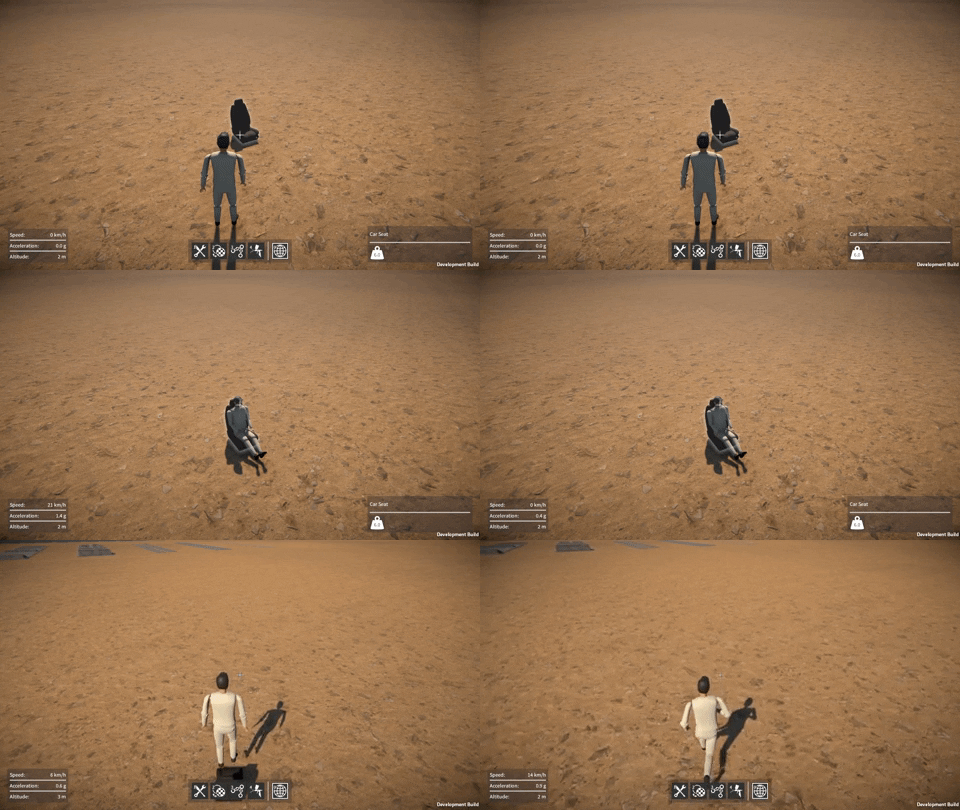
The janky placeholder player animations that have been in the game for ages were long overdue for replacement with something better.  Over the past couple of months I’ve been working on sourcing better animations, setting up the animation blending and transitions, and then driving that based on game state.

I worked out that I needed animations for:-

  • Standing idle.
  • Standing jump.
  • Turn left / right in place.
  • Locomotion (forward, backward, strafe left, strafe right) at various speeds from walking to sprinting.
  • Walking and running forward jumps (for jumping while moving backwards or strafing I just use the standing jump animation, as I couldn’t find anything more suitable).
  • Seated.
  • Tool holding (right arm held out) in up, forward, and down directions, blended based on the camera view direction.

I don’t have the budget to pay for an animator, so it was quite challenging to find suitable animation content to meet these requirements.  In the end I was able to get by with a combination of a paid animation pack from the Unity asset store, some free animations from https://www.mixamo.com/, and creating some animations from scratch.

It was a fiddly process to set up the animation state machine in Unity to get all these motions blending and transitioning nicely, but I’m happy with the final outcome:-

image
image
image

First person mode

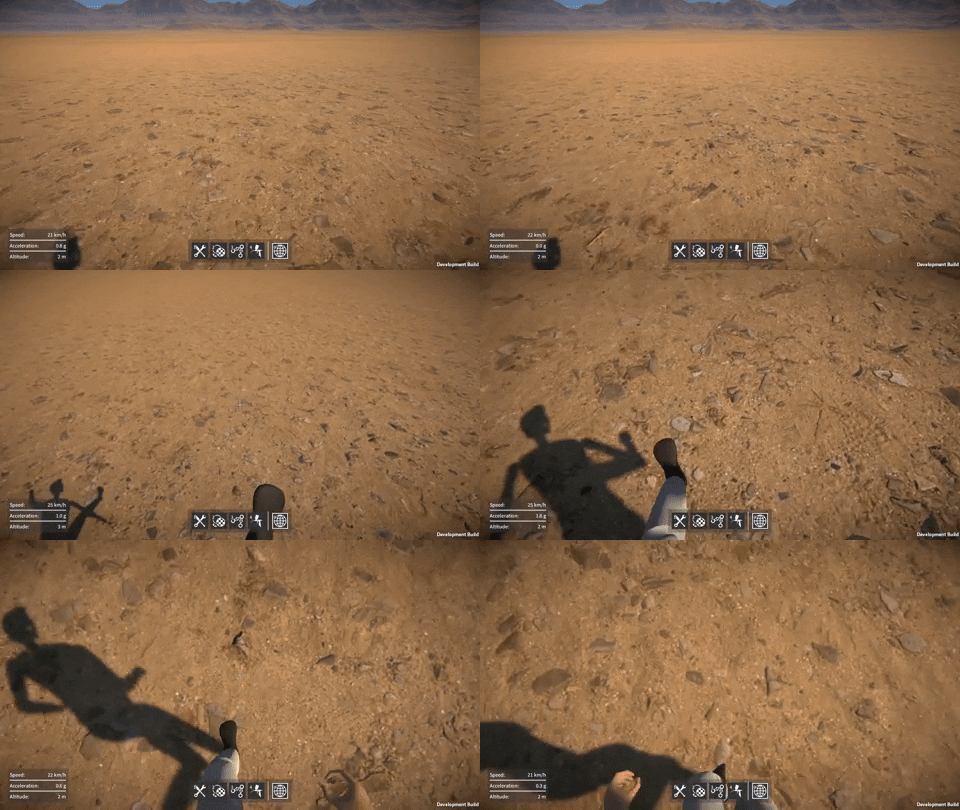
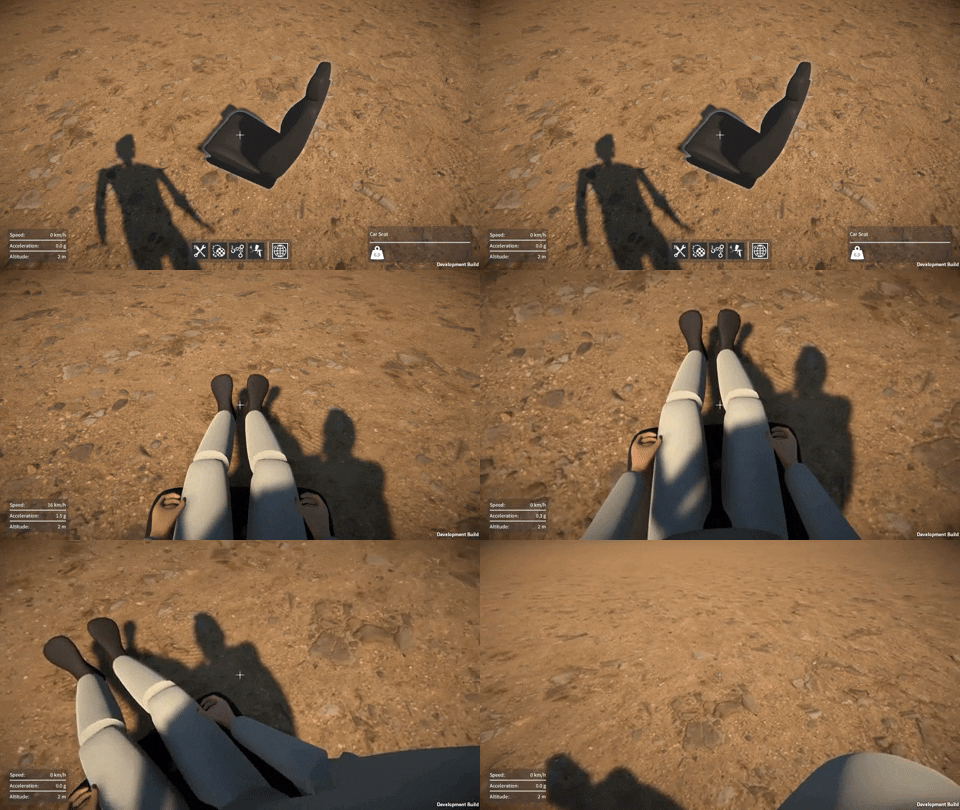
I’ve now enabled the animated player character in first person mode, the downside being that this can cause problems with bits of the body poking through the camera near clip plane, not the easiest thing to avoid especially if the camera is set to have a wide field of view.

To solve this I had to do a few tricks to offset the character and camera based on the view direction.  It also imposed restrictions on the range of motion of the upper torso and arms and therefore what animations I could use.  The end result is well worth it though:-

image
image

In first person mode the camera is now attached to the character’s animated head position, this adds a lot of life to the camera movement (e.g. “dipping” after landing from a jump), and makes a big difference to the feel of the game:-

image

Tools

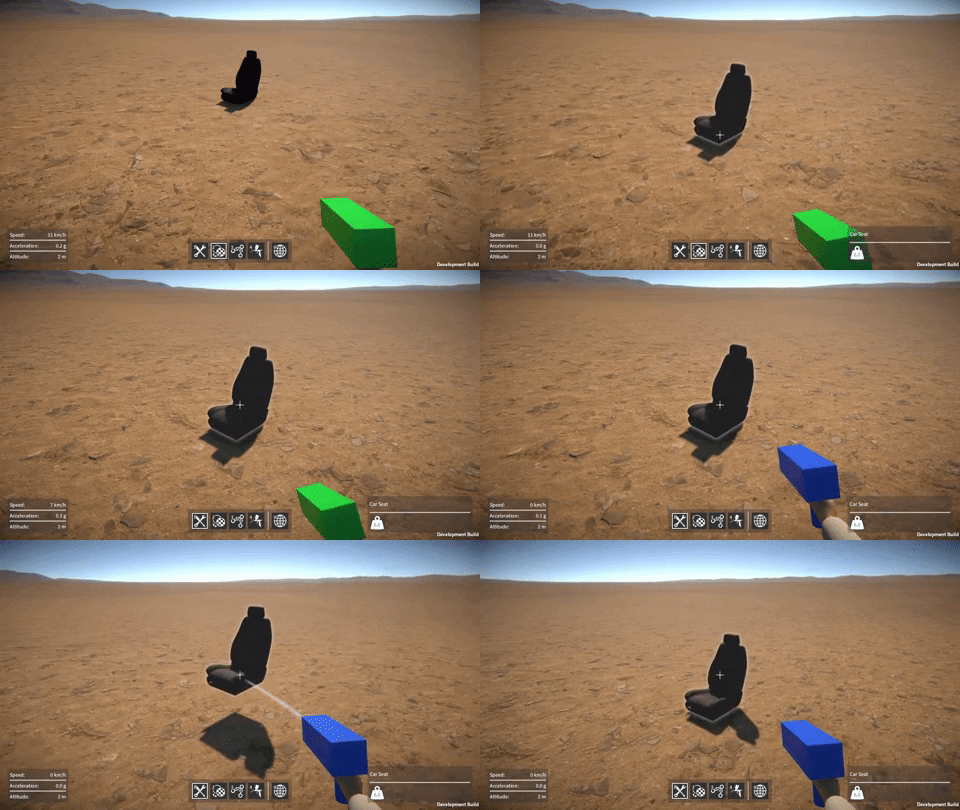
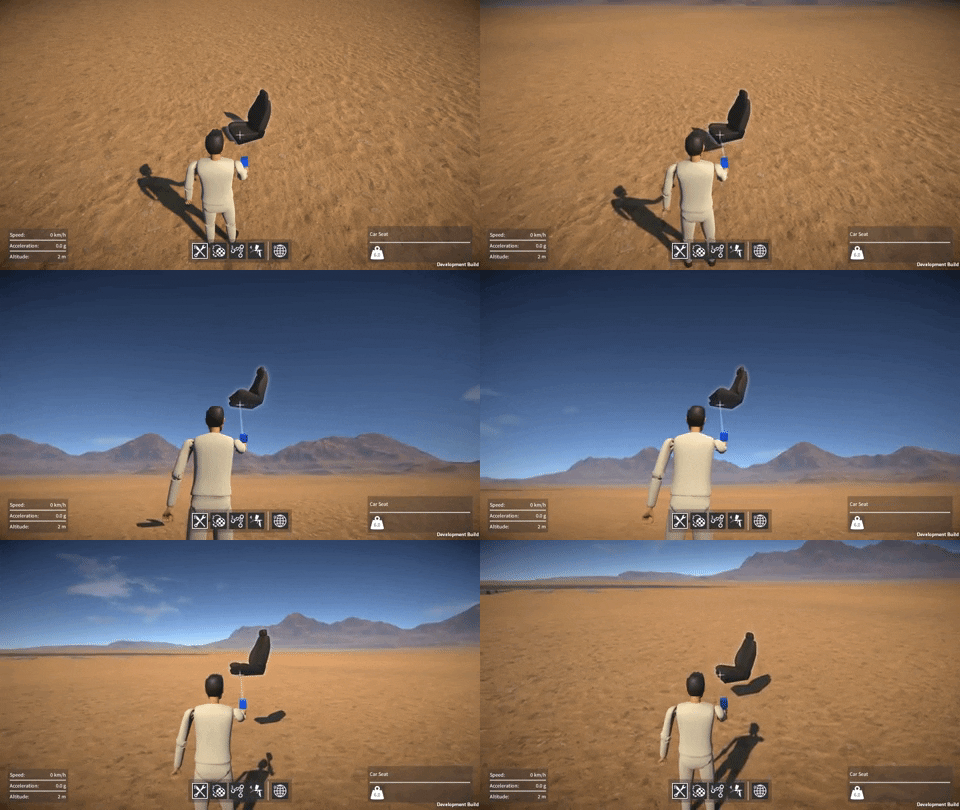
Once I had the player character animations working well in both first and third person modes, I moved on to the task of adding some tool models and attaching them to the player’s hand.  Now, as the player selects between the different tools (e.g. builder, painter, etc.), the transition between them is animated, and the models are swapped.  Right now I just have simple placeholder models for the tools, and I plan on adding some transition sound effects, but here’s what it looks like so far:-

image
image