Phew, it’s been a busy time lately! I decided it would be a good opportunity to take part in the upcoming Steam Game Festival from June 9th to 14th, so for the past few weeks I’ve been working towards getting ready for that, and there’s still a lot more to do.
I’m excited that soon the GearBlocks store page will be live on Steam, and a new updated demo build will be playable there during the festival!
Saved game changes
The first thing to mention is that I’ve removed support for the legacy save format, which means that saved games / constructions from demo builds prior to the most recent version (0.5.7362) will no longer load. You can still convert older saves into the new format by loading them into demo version 0.5.7362 and saving them back out.
I have also changed the saved game / construction folder structure slightly, so that all files for each save are now held in their own sub-folder (existing saves are converted over to this new folder structure). Also, each save now has an additional meta data file (for name, description, and tags).
I’ve modified all the save / load UI screens to allow the name, description, etc. to be entered / viewed when saving or loading, for example:-
All this was necessary for the next step…
Steamworks integration
Given that the GearBlocks demo will soon be up on Steam, I really wanted to take advantage of the platform from the get go, and utilise Steam Workshop in some way.
The first step was to get Steamworks integrated and initialised. I’m using the excellent Facepunch Steamworks .NET implementation (https://github.com/Facepunch/Facepunch.Steamworks), which seems to support everything I need, and I found it to be really easy to use!
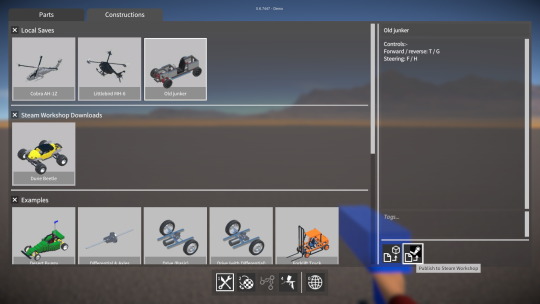
Next I implemented code for publishing saved constructions to the Workshop, and spawning subscribed (and downloaded) constructions, also modifying the construction spawner UI to support these operations:-
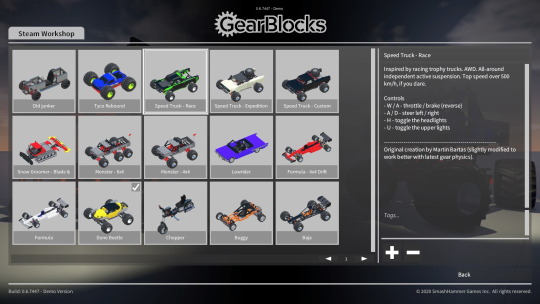
Finally, I built a basic browser screen to query and view all items currently uploaded to Steam Workshop, and to allow you to subscribe / unsubscribe to them:-
There’s a lot more work left to do for this screen, e.g. query sorting and filtering options, up / down voting of items, etc. but this has the bare bones functionality for now.
Also I plan on adding Workshop support for saved games, which should be relatively quick to do now, saved games already have meta data so they’re basically good to go.
Steam store page
Before the festival starts, I also need to get my store page ready for prime time, as this will link to the demo and give people an opportunity to wish-list the game. I still have plenty more work to do on this, but I’ve done most of the graphical assets now. I’m not going to reveal any of these just yet, but you may have already noticed the new and improved logo!
Over the past few weeks I’ve been working on the gears and a few other random bits and pieces.
Gear masses
I’ve now finished tuning the gear masses to have more reasonable values. They’re no longer crazily heavy but still work well in the situations I tested. Due to the lower mass values the gear’s “teeth” physics constraints can no longer handle as much torque loading as before. However I found this not to be such a problem because for example, vehicles are
generally
now much lighter (requiring less motor torque to accelerate them) so things tend to balance out OK.
Gear model improvements
I’ve also made some improvements to the gear models themselves and added additional axle attachment points to them, something I’ve been meaning to do for ages. These modifications serve two purposes, firstly it makes it easier to actually see the gears rotating, and secondly it allows for greater flexibility with what you can do with the gears.
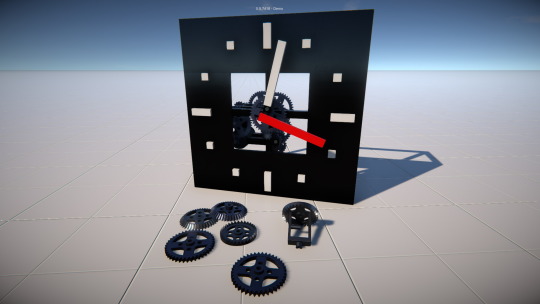
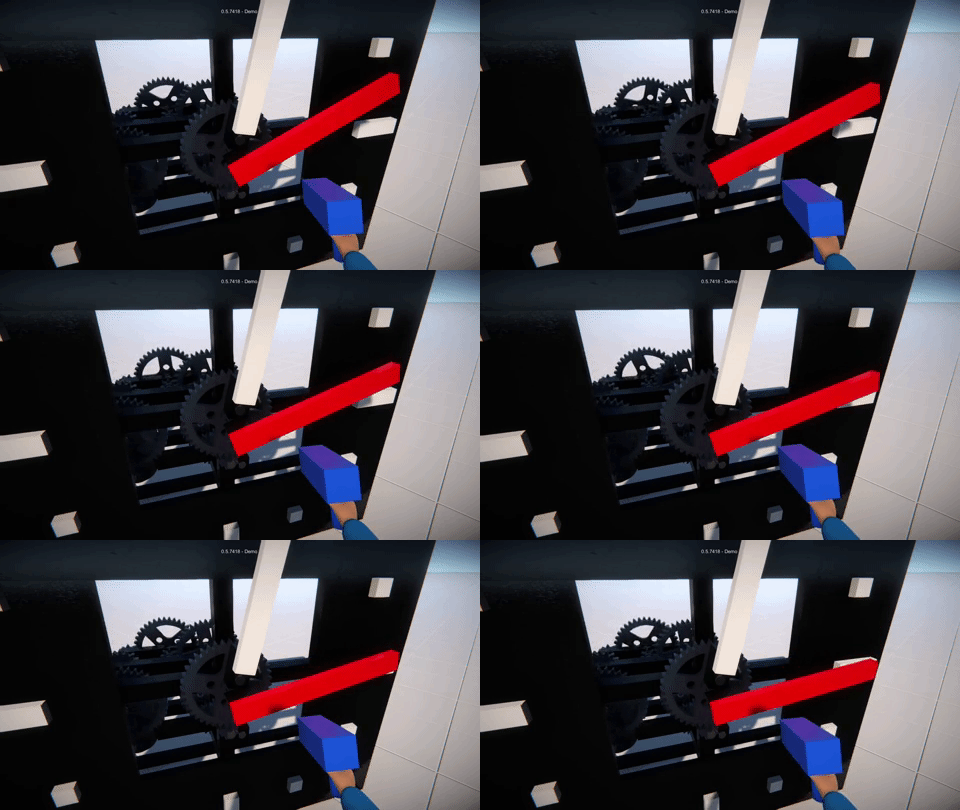
Here’s an example, the red hand of this stopwatch (indicating seconds) is rigidly attached to an axle “passing through” the central gear via a rotary bearing, while the white hand (showing minutes) is attached to another short axle rigidly attached to one of the gear’s new attachment points.
Other possibilities with these extra attachments include using the gear as a crank, attaching a structure such as a rotating platform to the gear, or even attaching other gears to the gear!
Other random non-gear related stuff
In order to try and improve performance for constructions with a large number of lights, I’ve made a first stab at a simple distance based culling for lights. I also plan on adding a settings option to disable shadows cast from them (separate from sun shadows), as this helps performance dramatically when you have a lot of lights.
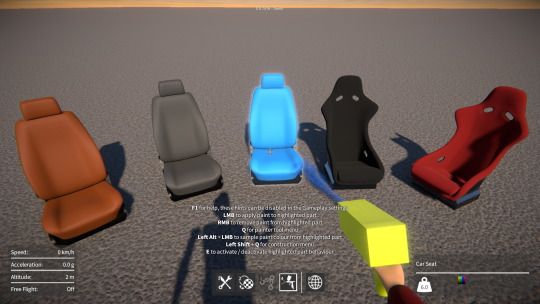
Another quick change was to make the seat fabrics be paintable to add a bit more variety to the seats!
Posted on
Discord Build Contest: March 21st – April 5th
Theme: Build an amusement park ride.
Thank you to all those that took part, and congrats to the winners. I had a lot of fun messing around with these builds. Been meaning to make this video for a while, but better late than never I guess!
Hey everyone, I hope you and your families are hanging in there during this crazy situation we’re all in at the moment. It seems like the whole world has been turned upside down over the past month or so. It’s hard to predict what the future will bring, or what the long term impacts will be, but I’ve been trying to stay focused as best I can by working on the game!
At some point soon I need to starting putting together trailer videos and other materials for GearBlocks, and for this I want to build some example creations to show off all the parts in the game. So a while back I started building a 4WD off-road buggy with differentials, CV joints, suspension and so on, but that’s when I ran into a problem.
Heavy gears and weird physics
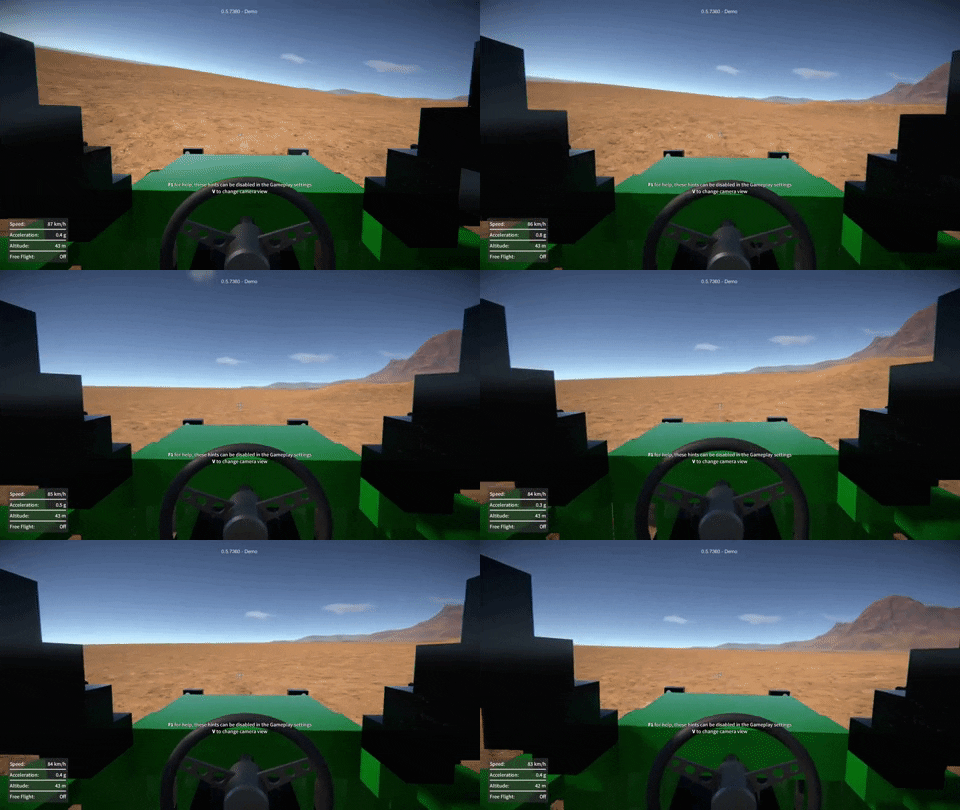
It’s an issue that someone pointed out to me quite a long time ago actually. It’s this: when you have a 4WD vehicle with a long axle connecting the front and rear differentials via gears, at high speed the vehicle wants to rotate in one direction (i.e. steer left or right) much more easily than the other. Its preferred direction depends on the direction of rotation of the long axle. This is a very odd and unnatural behaviour, almost like a kind of gyroscopic effect, and is even more noticeable in the air (during a jump for example). The problem can be reduced slightly by increasing the simulation update rate (and therefore physics accuracy) but this isn’t really practical as it slows performance too much.
It turns out that this weird behaviour is so noticeable because the gears all have really big masses (20kg each). When you have a gear on each end of a long axle (e.g. running front to rear of a 4WD vehicle), it has a large polar moment of inertia. I’m not entirely sure why, but this fact, combined with the high RPM of the axle is what seems to be making the problem so bad. I found that if I give the gears smaller, more appropriate mass values, the unwanted behaviour is significantly reduced.
Why do the gears have such high masses in the first place? Well, it’s a workaround to prevent the gear teeth from slipping from one physics constraint to the next. In the physics simulation, if you have two rigidbodies constrained together, generally speaking the more equal their masses, the better that constraint will solve (with less “stretchiness”). Giving the gears a large mass was a hack to try and balance them with the combined mass of all the parts in the rest of a typical construction.
I’ve always hated this hack, apart from anything else it makes constructions with a lot of gears weigh a huge amount! So I’ve been working on a way to make the gear constraints more resilient, allowing the gears to have more reasonable masses, while still preventing gears slipping.
Searching for an anchor
Previously, when two gears were engaged, for each gear the closest constraint anchor position to the other gear would be found. The problem is, on any particular gear each possible anchor position is quite close to its neighbours, making it easy to slip from one to the next if the constraint doesn’t solve very well (i.e. if it “stretches”). However, I realised there’s a better approach, here’s how it works.
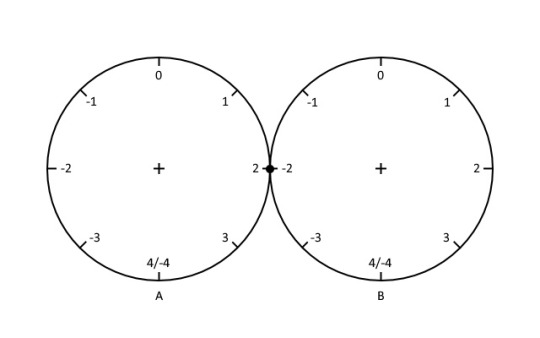
Starting with the simplest case – two gears with an equal number of teeth. As before, for the first gear in an engaged pair, the closest anchor position to the second gear is found. Then, taking the index of the first anchor and negating it will give the anchor index for the second gear, as it can be assumed to match only one possible anchor on that second gear, as shown below.
By directly mapping the first gear’s anchor index onto the second gear makes it almost impossible for the gears to slip. The physics constraint would have to stretch so much that the gears rotate one whole revolution opposite to one another, very unlikely to happen!
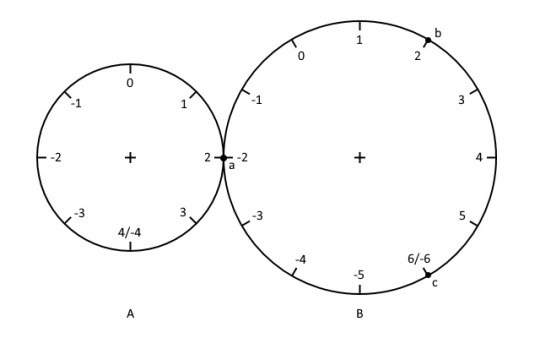
To make this work with a pair of gears with an unequal number of teeth is a little trickier. The largest common factor of the two gear’s numbers of teeth has to be considered when mapping the first gear’s anchor index onto the second. This means that there is no longer only one possible anchor on the second gear, for example here’s a situation with three possibilities (a, b, or c).
It means that, of these three possible anchor positions, the closest to the first gear must be found. However, they’re still far enough apart that slipping from one to the next is highly unlikely.
Finally, I had to account for the relative orientation of two gears when they first become engaged. So an anchor index offset is calculated at the point of engagement, that is subsequently applied when mapping an anchor index from one gear to another.
Other gears, and pulleys
Once I had this all working for gear wheels, I then applied the same principle to rack and worm gears. Previously, if for example you crashed a vehicle with rack and pinion steering, it was very common for the rack gear to slip, causing the steering to be offset. You’d have to freeze and unfreeze the construction to fix it. Now this annoyance is much less likely to happen!
I also re-implemented the constraint anchor search code for pulleys to work in a similar way to the gears, bringing the same benefits to the pulleys.
Tuning the masses
I’m now in the process of tuning the gear masses. For stability under high torque loads, I’m finding I still need to give them masses higher than they would naturally have (albeit not as high as before), particularly for the smaller gears. It takes a lot of testing, but hopefully soon I’ll be able to settle on some reasonable masses for the gears that work well in most situations.
All told, this has been a lot of work (that I wasn’t planning to have to do), but I think the results are well worth it!
Posted on
An update all about the latest demo, showing the physics performance improvements, a tutorial on the new debug console, and more.
Sorry everyone, the latest build (0.5.7361) had a bug where slider rails would not attach to anything, so I’m releasing another build with a fix for this.
The problem was due to an issue in the Unity editor with multi-select editing (i.e. selecting multiple gameobjects and editing common serialized properties). This can mess up serialized enum properties, I’ve been bitten by this before, and that’s what happened here. The slider rail part was inadvertently set to have the same alignment and attachment flags as the axle part. An easy fix to set it back to the correct enum flags, but such a stupid and annoying problem.
I also found another bug that was a silly error on my part that messed up switching between first / third person mode, so I’ve fixed that too.
Here’s the latest demo update with the new saved game format, all the physics and rendering performance optimisations, player physics improvements, debug console, etc.
In this update I’ll briefly go over what I worked on last week. This week so far has been focused on bug fixes and preparing for another demo release which should be coming very soon!
Take a seat
Previously, when a player activated a seat, they would be “locked” into the seat by their transform being re-parented to the seat part’s transform, and their Collider / Rigidbody disabled.
This meant that the player would suddenly seem to have no mass, having no weight exerted on the seat.
So instead, I now keep the player’s physics active, and lock them into the seat using a ConfigurableJoint between the player’s Rigidbody and the seat part’s parent Rigidbody.
This means that the player’s mass now dynamically affects the construction they’re seated in. Also, by setting up the ConfigurableJoint appropriately it allows for some sprung-damped “give” between the seat and player, as you can see below.
It does of course mean however that constructions now have a little more overall mass and a slightly different CoG when players are riding in them, much as in real life.
Highlighting render optimisation
When a part (or a whole construction) is frozen, selected, etc. it is highlighted with a glowing outline. To achieve this the part’s meshes are drawn in a “mask” render pass that accumulates the outlines of all the highlighted objects. However, up ‘til now, even parts / constructions that weren’t currently being highlighted would still be drawn in this pass (having no visual effect and not necessary).
So now I’ve modified things so that it no longer draws parts in the highlighting mask render pass unless they are actually currently being highlighted.
I also tweaked the mask render shader to fade the highlighting out over distance, and set the camera far clip plane to cull objects beyond the “fully faded out” distance.
These changes save on draw calls, and give a slight rendering performance improvement when viewing constructions with a large number of parts.
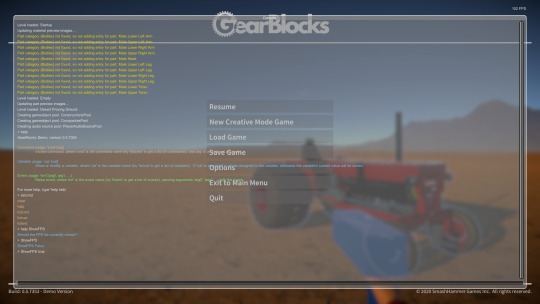
Over the weekend I implemented a debug console in the game, something I’ve been wanting to do for ages. It shows logging output, and it can be used to inspect / modify variables, and trigger events in the game.
This was pretty simple to do, because the “global” variables and events were already implemented as ScriptableObject assets (see ScriptableObjects For Fun and Profit for details). It was just a matter of making them automatically add themselves to a list to then be accessible in the console. Almost as if I’d planned it that way from the beginning!
These existing variables and events are used by the various systems in the game, and don’t all necessarily make sense to mess with in the console, but many can be useful for testing purposes, or simply for playing around under the hood. I did add a couple of extra variables just for fun though, one to modify gravity, and another to change the time scale (slow-mo / fast forward).
The console itself has a simple UI, just scrolling text with a box to input commands at the bottom.
There are a few different available commands, for example to do things like listing the available variables or events, or to get help on using the console.Typing a variable’s name will shows its current value, or typing its name followed by a value will modify it. Typing an event’s name (followed by arguments if required) will raise that event, which can cause things to happen in the game (depending on the game’s current state).
Now that I’ve removed the old RakNet networking stuff, I’ve been unblocked from upgrading to later versions of Unity, and so that’s what I’ve been working on over the past couple of weeks.
Unity 2018.4
First I upgraded from 2017.4 to Unity 2018.4, this brought some significant improvements:-
PhysX upgraded to 3.4, I found this to be a big performance improvement, especially for constructions with a large number of rigidbodies / constraints.
Non allocating collision contacts. By enabling “Reuse Collision Callbacks”, and using the new Collision.GetContacts() API in OnCollisionEnter / OnCollisionStay, this eliminates GC allocs and improves physics performance too.
Graphics jobs no longer marked as “experimental”, so I enabled this, it should take some load off the main render thread.
Terrain instanced rendering, fewer draw calls for rendering the terrain mesh.
.NET 4.x no longer experimental, so I switched over to this from version 3.5.
IL2CPP scripting back-end for standalone builds, compiles to native binary, should improve performance and is more secure than shipping IL assemblies.
Unity 2019.3
Then moving on to 2019.3, which included a PhysX upgrade to version 4.1, this didn’t seem to provide any additional performance gains out of the box, but it does introduce some intriguing possibilities:-
New temporal Gauss Seidel solver (see below).
Automatic box broad-phase pruning, I tried this and didn’t notice any performance improvement, but I need to do some more tests to be sure.
Temporal solver
This new solver is supposed to improve stability for jointed rigidbodies with large mass ratios. I was hoping that it would eliminate or at least reduce the need for “fake” masses. For example, the gears right now all have the same (quite large) mass regardless of their size, to prevent them slipping, and it would be nice to give them real masses instead.
Unfortunately in my experiments this didn’t work out, in fact even leaving the gears with their fake masses, they wouldn’t run smoothly at all. It was almost as if the constraints between them were now too stiff, so instead of locking them together I tried using a limit with a small distance, to introduce some “backlash” to relax things slightly. This definitely helped but was still not completely smooth.
Sadly though, there were many other problems too, such as CV joints glitching out like crazy under even small torque loads, and wheels sinking through the ground. Not to mention spring dampers being way too strong (I guess everything would need re-tuning).
So I decided to leave this for now and stick with the old projected solver. There is a potential massive performance gain to be had with the temporal solver however, due to its faster convergence. I found that to achieve the same approximate constraint “stiffness”, it seems to only need the number of solver steps to be scaled linearly with the sim fixed time step, rather than with the square of the time step like the old projected solver.
I think this new solver will be worth revisiting again if I have time at some point in the future.
Performance results
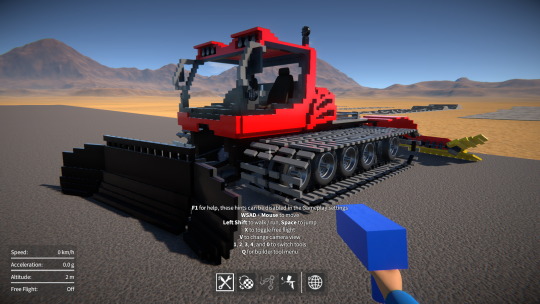
One of you talented folks sent me this awesome snow groomer creation! It’s quite physics heavy due to the tank tracks (a large number of rigidbodies, constraints, and collision contacts), so I’ve been using it as a test case to do some before and after performance comparisons.
I also compared with “Continuous Contact Detection” under the gameplay settings both on and off. Turning this off disables OnCollisionStay, which makes a big performance difference when there are a large number of collision contacts (the only downside being you get no sliding sound effects).
Here are some results (running on my dev machine at 1920×1080 full-screen) with the snow groomer:-