Just a quick dev update to talk about some new construction UI features and other recent work I’ve been doing on the game.
(Source: https://www.youtube.com/)

Just a quick dev update to talk about some new construction UI features and other recent work I’ve been doing on the game.
New construction system done (mostly)
In the last dev update I discussed the new part alignment search system I was working on. At that point there were a couple of things left to do: implement a bounding volume hierarchy for part bounds, and implement the part collider intersection tests. The second of these two is now done, which means the game is now functional again. I decided to do the BVH as an optimisation step later, as the game works fine without it (albeit with reduced performance in certain cases), and I wanted to get a new demo release out ASAP!
UI improvements
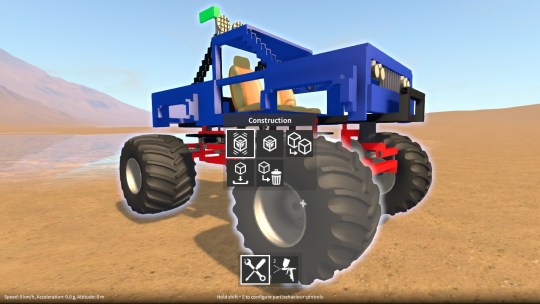
I have also implemented some new features that are in the latest demo. In the construction menu (to access, highlight a construction and hold shift + hold / press Q), there are some additional buttons to activate / deactivate all of the construction’s part behaviours. So you no longer have to hunt through all the parts in a construction and activate each behaviour individually.

In the builder tool UI, there’s now a new “world” tab. This contains a list of constructions currently in the world and provides the ability to pick a construction and then remotely: select it, activate / deactivate all of its behaviours, toggle it frozen / unfrozen, clone it, save it, or delete it. So if you ever lose a construction because it rolled away down a hill, at least you can always get it back now!
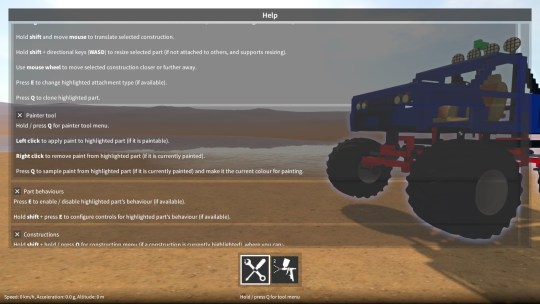
There are also a few other improvements and tweaks, such as a help window summarising the game controls (accessed by holding / pressing F1).
Next up
I’m now at a point where it’s time to revisit the Unity 5 upgrade again (can’t put it off any longer!), so I’ll be looking at that next. I’m not entirely sure how this is gonna go, but I just hope I can find a way around the remaining physics issues.
Beyond that, there are a ton of things I really want to get to, the main ones being: improving the environment / map (having flat area to build on), making the construction controls better, and implementing a challenge / tutorial system.
As I haven’t put out an update in over a month, I thought it’d be a good idea to explain what I’ve been working on. Be warned, this is gonna be long (and probably tedious)!
As I alluded to in an earlier post, I wanted to come up with a better system for determining attachment points between parts when the player is building their constructions. The existing old implementation (which had been around since the initial prototype) had some fundamental problems and was long overdue for replacement. I’d been putting this task off since it’s a big job to re-implement such a core part of the game (during which the game is basically broken) but finally the time came to tackle it!
Before I get into implementation details, let me describe the construction process a little. Here’s the scenario; the player has a part selected (which may be part of a larger construction consisting of many parts), they rotate their selection to the approximate desired orientation, and highlight another part with their cursor (again, which may be part of a larger construction) at roughly the location where they want the selected part to go. During which the construction system continually ensures that their selection is aligned correctly to the highlighted part, and checks that attachment is allowable. Once the player is happy they can opt to finalise the attachment, in so doing merging the two constructions together.
So, every frame, as the player moves their selection and / or highlight location, the construction system must update itself in order to be ready for merging the two constructions together. There are essentially two phases to this update.
Phase one – alignment
Automatically align the selected part to the highlighted part:-
Phase two – attachment search and validation
Based on the current relative locations of all the parts in the selected and highlighted constructions (after being aligned by phase one) it must then:-
The first phase isn’t a big deal because it only ever has to search the alignment points within two parts. However, the second phase (at least naively) needs to compare every alignment point in every part in the selected construction against every alignment point in every part in the highlighted construction. This O(n^2) type of search is obviously not practical as it would quickly get very slow with larger constructions (or even with parts that have many alignment points). A more optimal approach is needed and this is the crux of the problem.
Early on in the project, rather than creating my own spatial search system, I decided to try and simplify things by making use of Unity’s physics in order to help with the second phase attachment search described above. At a high level, this worked as follows:-
As a side note, you may wonder why I used OnCollisionStay rather than OnCollisionEnter and OnCollisionExit. That’s because if the player moves parts relative to each other but their colliders don’t happen to exit and re-enter, I wouldn’t get updated contact points.
Problems
Despite serving fairly well for a long time, this implementation had some fundamental issues that I was never able to satisfactorily work around:-
In short, this method was buggy, slow, and would make upgrading to Unity 5 awkward.
I decided I needed to break my dependency on using Unity physics for solving this problem. This would avoid the fixed update vs. frame update problems as well as the frozen rigidbody performance costs and issues.
The solution I’m currently working on goes somewhat like this:-
Right now I have a good portion of this new solution working, including the new alignment grid system, but there are still two major pieces left to do:-
Once this is all done, the new construction system won’t seem much different from the outside to the player. However, it will be more stable, perform better, and remove one more roadblock to the Unity 5 upgrade.
Speaking of which, the Unity 5 upgrade is what I want to look at after, although I may put together some stuff for another demo release first, we’ll see!
New parts
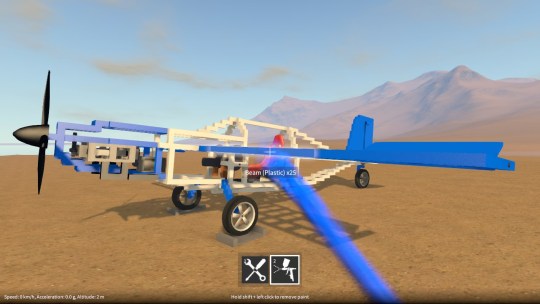
Since the last update that introduced the new part pairing system, I’ve been creating new types of parts that take advantage of this, including new connectors (ball and socket, CV joint, etc.) and specialised suspension parts. These new parts allow for fully independent suspension with steering and front / rear / four wheel drive (even four wheel steering if you want!) I’ve also added other new parts with new behaviours – a stepper motor and hydraulic actuators whose linear movement can be controlled by the player.
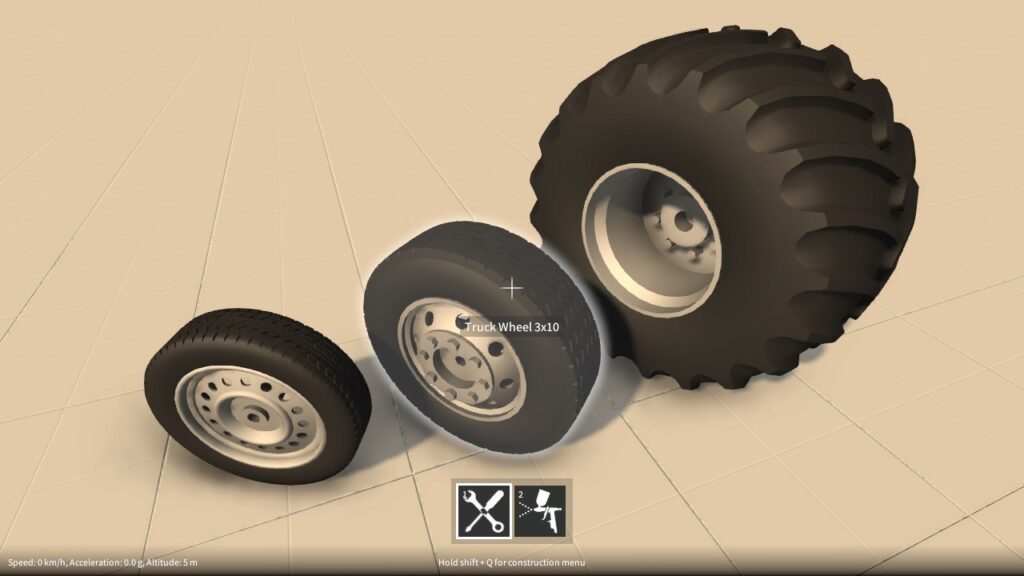
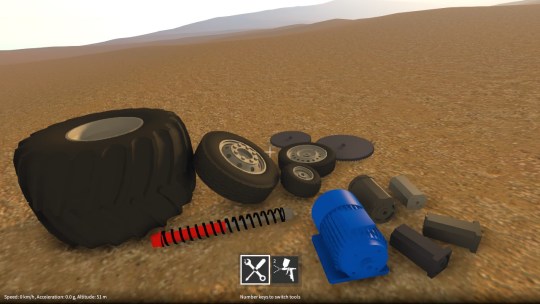
I’m keeping these new parts under wraps for now, but I can show some others that I’ve also added which are variations of existing parts – a new large spring damper, new gear sizes, new motors of different sizes, and more wheel variations. I got tired of the old motor and wheel models so I spent some time brushing up on my 3D modelling skills and made some new ones! I’m pretty happy how they turned out although they still need tweaking and UV mapping at some point. I plan on adding many more variations for wheels, seats, lights etc.
Note that no additional parts are in the demo, but I have updated all the existing demo parts with their new versions.
Part alignment
I’ve also been working on how parts align together during construction, so that this system works better with the new parts I added. This was mainly to prevent axles penetrating through parts, and to make the alignment behaviour a bit more intuitive. Some parts (such as motors) are now slightly more restrictive in how they can attach to other parts. On the other hand, the spring damper barrel and piston parts are now less restrictive in that they can now be attached together at several different alignment points, which allows for different “default” spring extensions when the construction is frozen.
Other changes
I’ve changed the underlying physics implementation of rotary attachments (hinges) to be in line with all the other jointed attachments. Among other things, this allowed me to add a configurable torque value to the servo motor part behaviour. Finally, a bunch of other things have been tweaked, including new UI elements, SFX and so on.
GearBlocks dev diary demoing the updated part behaviour controls.
Another demo build is out, here’s what’s in it!
Part behaviour controls
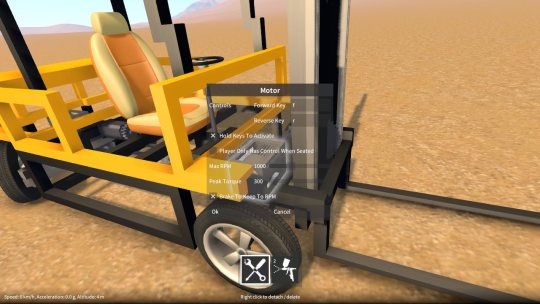
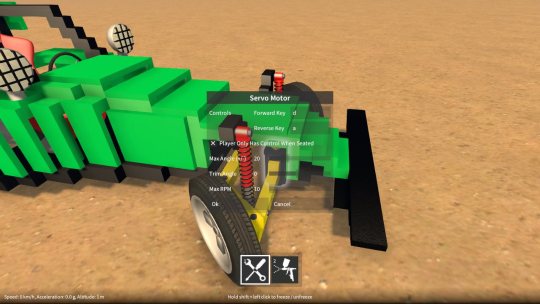
Rather than only being able to control motors, servos etc. with the directional keys (i.e. WASD), you can now assign your own keys in the part behaviour dialog (highlight the part, hold shift & press E). This opens up all sorts of possibilities as you can now control multiple motors at once using separate sets of keys. There is also the option to have the motor only accept control input when the player is sitting in a seat that is part of the same construction as the motor. This is handy, say, for when switching between vehicles that are set up to use the same key assignments.
Motor and servo improvements
The motor now has a “brake” option that stops the motor from spinning when it is switched on but not activated. This ability to “hold in place” the drive train attached to the motor is useful for lifts, cranes, and many other things. The fork lift truck I recently posted a video on makes use of this feature to hold the forks in place when you’re not moving them up or down.
Rather than snapping immediately to its required angle, the servo motor now transitions smoothly at a fixed speed. I’ve added an RPM setting that allows this speed to be adjusted to suit the purpose you’re using the servo for.
Save / load of constructions
An individual construction can now be saved out by highlighting it, bringing up the construction menu (by holding shift & Q), and clicking the save button. This brings up another window that shows any currently saved constructions, lets you choose a name to save under and so on. The constructions get saved into the SavedConstructions folder under wherever you’re running the game from.
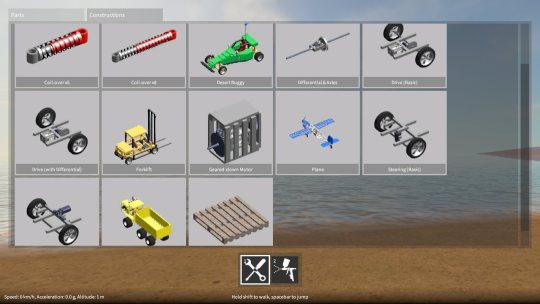
To spawn a construction you previously saved, in the builder tool mode, hold Q to bring up the builder tool GUI and click the Constructions tab. There you’ll find all your saved constructions, just click on one to spawn it. Also, I’ve included some built-in example constructions for you to experiment with!
It’s been a long while since the last update, I was away for a bit, then got sick which took me out of action for a while. But anyway, finally I’ve gotten a new build out the door – here’s what’s new…
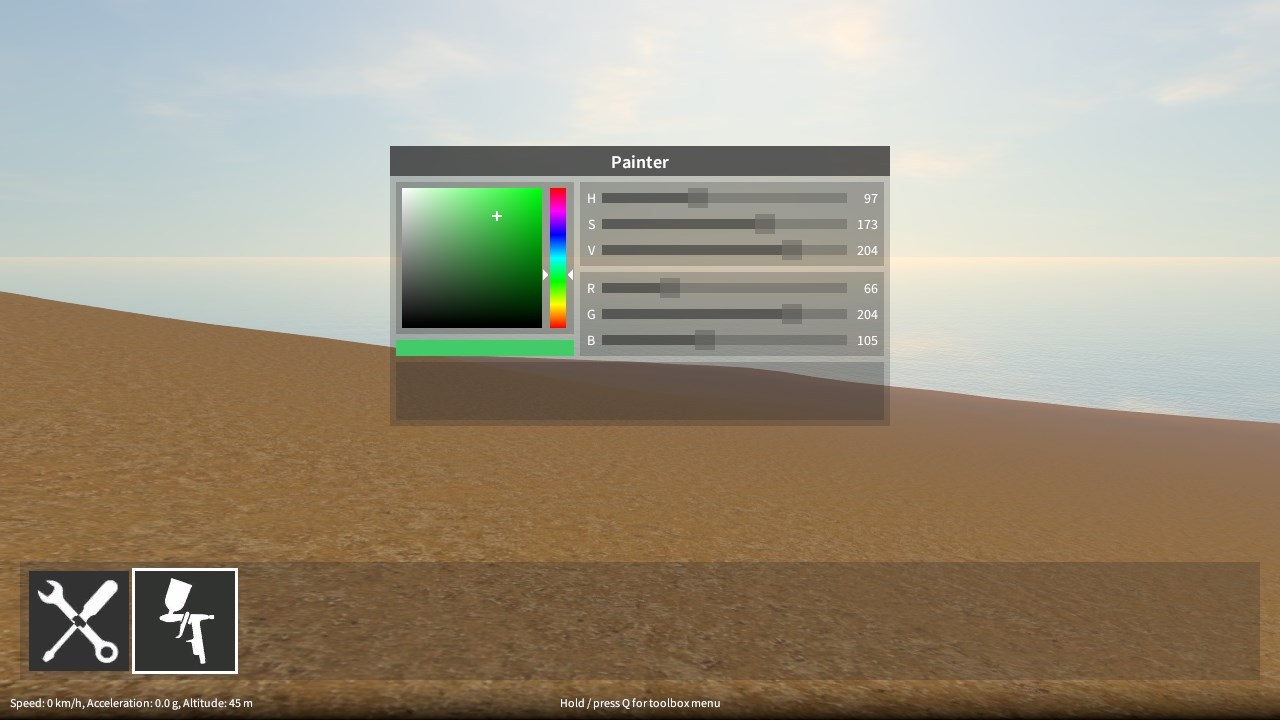
Painter tool
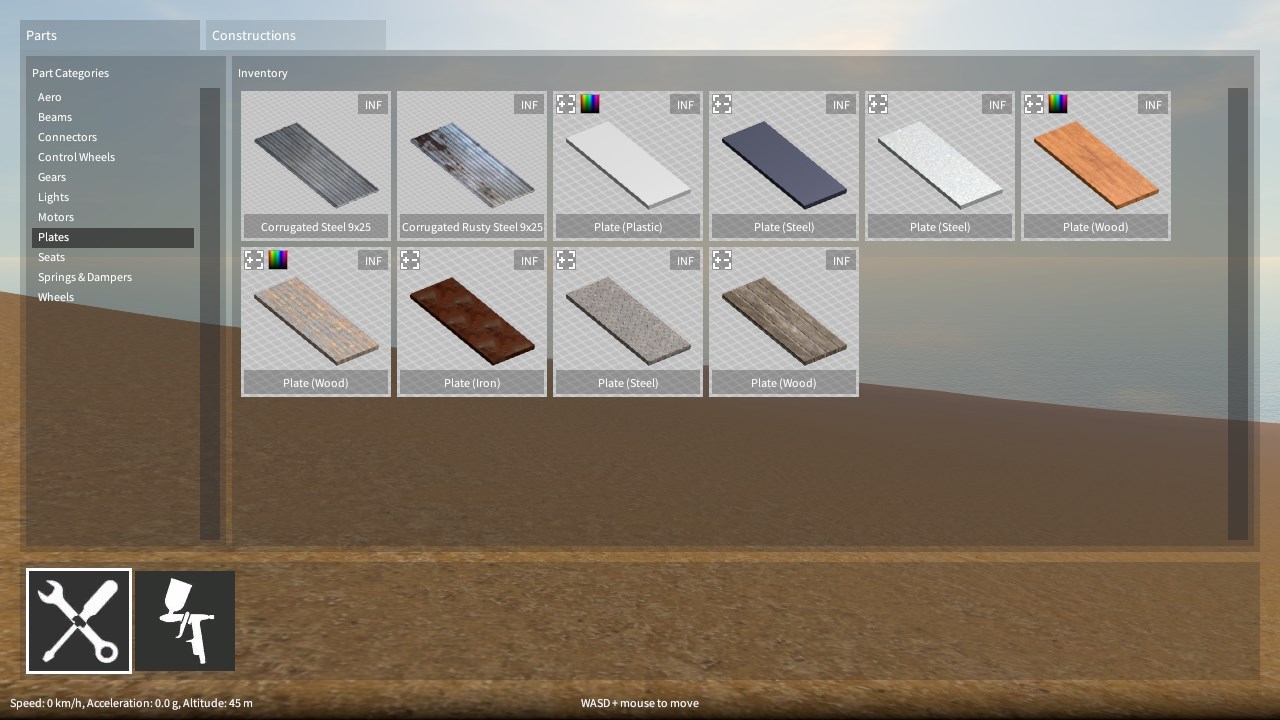
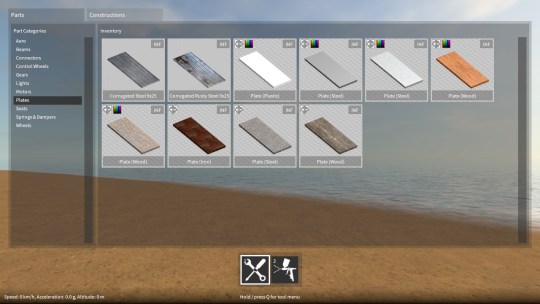
There is now a new tool in the game that allows you to apply colour to the currently highlighted part (if it is paintable). Paintable parts can be identified in the part spawner menu as the ones with the colour icon in the top left corner of their preview images.
The numeric keys select which tool is currently active, 1 for the builder tool (i.e. the pre-existing construction controls) and 2 for the new painter tool. The currently active tool is indicated in a new toolbar at the bottom of the screen (you can also select a tool by clicking on the icons in this toolbar). When the builder tool is active, using Q will bring up the part spawner menu as before, but when the painter tool is active, Q brings up a different menu, one that lets you choose a colour to paint with. Note that in the demo, some of the paint colour controls in this menu are disabled, but you can still choose from a fixed palette of colours.

When the painter tool is active, the following controls are available:-
Other improvements
Also in the latest build, Q can now be optionally made to toggle the tool UI, instead of having to hold Q. To activate this, there is a check box option in the input settings.
The electric motor peak RPM and torque are now configurable from the part behaviour configuration dialog, which allows the motor to be fine tuned to better suit the construction that you’re building.