Here’s part 2 of this player creation’s series, some very cool stuff in this one. The final part will uploaded very soon. Enjoy, and thanks everyone!
(Source: https://www.youtube.com/)

Here’s part 2 of this player creation’s series, some very cool stuff in this one. The final part will uploaded very soon. Enjoy, and thanks everyone!
Part 1 of a series of videos demoing some of the fantastic GearBlocks community builds from last year. I meant to do this at the end of the year, but I was working on adding a third person camera to the game and I wanted to wait until that was in, as it better shows off these creations!
Parts 2 and 3 will be coming soon…
Highlighting a few things from the latest demo – how to use the configurable key bindings, and some updates to the lights and differential gear.
Well, at long last the new demo build is out!
SmashHammer Games
My company is now incorporated, SmashHammer Games is born! I’m still waiting on the accountant to do his part of the process, hopefully this will be sorted soon, but I don’t think this should hold me back from moving forward with the game
in the meantime.
Bugs and memory leaks
I was actually ready to release the demo a couple of weeks ago, but I was doing some last minute testing, and noticed some performance slowdowns in certain situations (for example, when highlighting a part). I also noticed some memory leaks and several bugs that I hadn’t spotted before, not good!
So I decided to hold off releasing it, to fix these issues first. This ended up requiring fairly significant refactoring and reworking of some of the code, so took quite a while unfortunately. Oh well, at least it’s done now!
Saved file location
The saved file locations have changed (they’re no longer in game folder). The new locations are:-
Saved games and constructions from the previous build (0.4.6095) should still load, but you’ll need to copy them into these new locations.
Here’s what I’ve been up to over the last couple of weeks. I’m still working on the company set up stuff, it’s unfamiliar territory for me, so I had to do a bit of research and get advice from some people. I won’t bore you with the details, but it seems there’s no getting around the complexities that require both an accountant and lawyer. This is going to cost me a lot of money, so I want to be sure before going ahead with it!
Upcoming demo
I’ll upload the demo update as soon as the company is sorted (should be soon now), but in the meantime, here’s a sneak peak at the changes that will be in it:-
As usual I’ve updated any parts that were already in the demo, but I’m not adding any additional ones, all the new parts I’m making are for the full game only!
Slopes and wedges
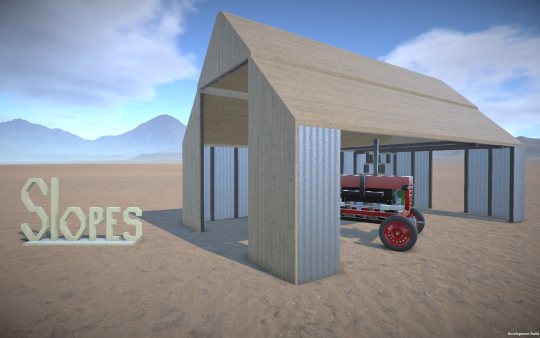
On the subject of new parts, I’ve now implemented resizable sloped beams and plates, as well as resizable wedge plates.
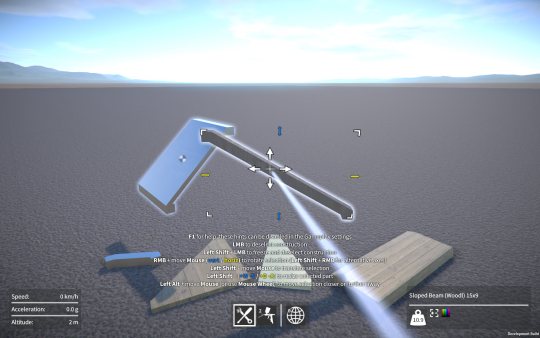
Designing their shapes was a bit of a challenge because I had to find a compromise between these three competing requirements:-
The wedge shape was the trickiest to represent with box colliders. I contemplated using a convex mesh collider for it, but I wanted to avoid this as they are generally less efficient for physics, and I also have part intersection tests in the game that only work for primitive colliders. So instead I created a system to dynamically add box colliders, three for the wedge edges, and then recursively adding more to fill in the wedge interior (the larger the wedge, the more interior colliders are needed). An example of this can be seen below.
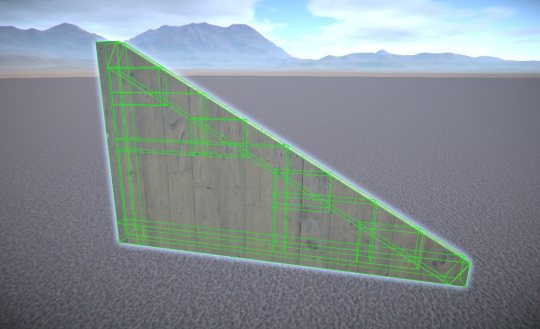
All resizable parts in GearBlocks use procedurally generated meshes, so I had to implement mesh generation for these new slope and wedge parts. This wasn’t too difficult but did require a fair bit of refactoring of my procedural mesh system to allow for these more intricate shapes.
Here’s a comparison of the Desert Buggy construction, the original version vs. one I made using the new slope and wedge parts.
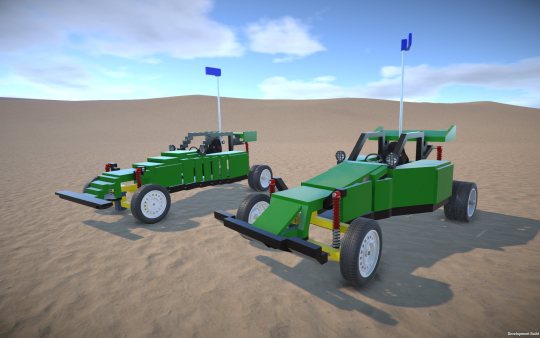
Not only does the slopes and wedges version look way better, it uses nearly 50 fewer parts than the original!
In the future I want to add a compound sloped plate (i.e. a “corner” piece), as well as curved beams and plates. The trouble is, the colliders for these will be even more tricky to set up. I might need so many box colliders to represent these shapes that it wouldn’t be practical, so I may well have to resort to convex mesh colliders for these. Anyway, something I’ll come back to later.
Construction interface problems
The sloped plate part is the first part in the game that is resizable along all three axes. Unfortunately this particularly highlights the awkwardness of the current part positioning and resizing interface. I’m not sure what I’m going to do about this yet, but I think I’ll have to revisit the construction controls yet again. There has to be a way I can make this better, but I’m just not seeing it right now!
So, um, that demo release I’ve been promising, where is it you might ask? The good news is, it’s ready to release (has been for a while actually). The last thing was to set up an installer for it and that’s all done now (if you’re wondering, I used Inno Setup for this, found it a super easy tool to use, with great results!)
Unfortunately, I can’t release it just yet as I’m still working on getting my company set up. This is turning out to be more complicated and expensive than I first realised. Incorporating the company itself is easy, but because I’ve already been developing GearBlocks for a while, I’ll need to transfer GearBlocks IP to the company, which complicates things and adds to the cost (accountant fees on top of the lawyer fees!) Anyway, I’ll keep plugging away at this and hopefully get it done in the next week or two.
In the meantime I’ve been adding more parts – some new sliding rack gears with integrated ball joints / hinges (makes for neater steering systems), more lights, and a seat. I’ve also implemented limited slip functionality in the differential gear, with configurable “locking strength”, should keep that wheel spin under control!
I plan on adding various types of sloped / curved beams and plates to the game, this will make constructions look a lot better (and save on the number of parts needed in a lot of cases). Next week I’ll start work on what should be the simplest of these, a resizable sloped beam.
Selection points
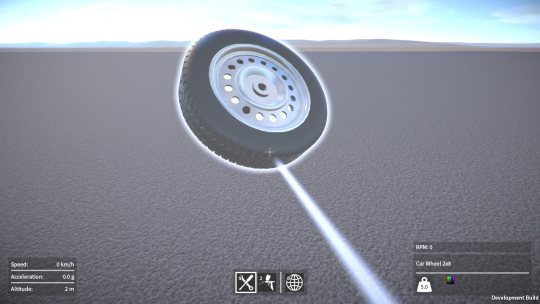
Over the last few weeks I’ve been working on fixing something with the construction controls that’s been bugging me for ages. I wasn’t happy with the range of positions at which you could select a part, you could select it anywhere within its bounds, which wasn’t really restrictive enough.
Here’s an example. You could select anywhere on a wheel, even though it only has one point that can attach to anything.
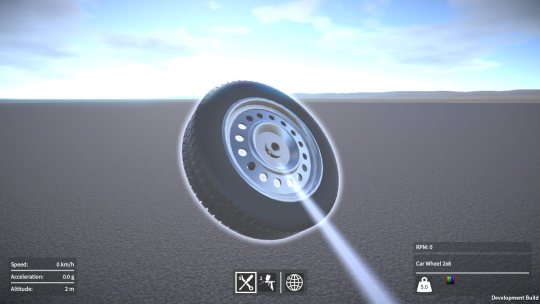
Much better to restrict the selection point to always be at this attachment point as shown below, that way it feels more natural when attaching the wheel to another part.
This next example is even worse. You could select anywhere on a seat, and then translate it so that the selection point was completely outside the seat which is just plain stupid.
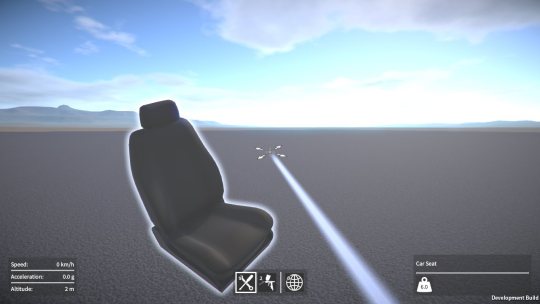
So now I restrict the selection point to be somewhere in the region on the bottom of the seat where its attachment points are, so you always have it selected in a suitable place ready to attach to another part.
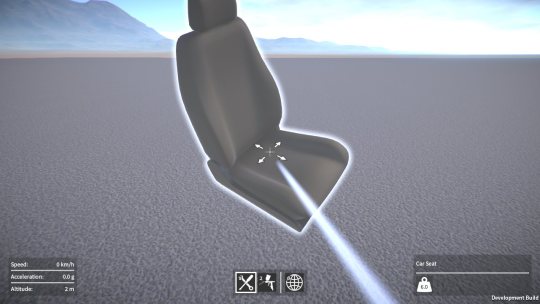
To accomplish this I had to rework some code so that it now automatically calculates the selection region based on where all the part’s attachment points are located. The upside to this was that I could do away with explicitly specifying the allowed translation directions on each part. The less I have to manually setup per part the better!
I also had to implement some new math functions to find the closest point on the part’s selection region to the player’s eye “ray”. Took a while to do, but it’s never a bad thing to add more stuff to my math toolkit I suppose, could come in handy for other things in the future.
All this took way longer than I expected, it was only supposed to be a couple of day’s work, sigh.
Prop parts
I’ve also added some new “prop” parts. Props are a new category of part that are the simplest objects in the game, they don’t have a behaviour and they don’t attach to any other part. The idea is that they can be used with the machines and vehicles you build or placed in the world to set up a scene to play in. For example, traffic barriers could be laid out to form a race track, the ball could be used in a Rube Goldberg machine.
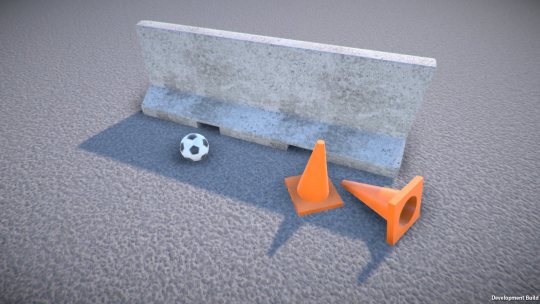
As with all the other parts, I’ll be adding more props as I go, any suggestions for these are welcome!
…and here’s a video of the tractor. It could do with some proper wheels and the steering would work better with the ball & socket connectors, but I was limiting myself to parts available in the demo.
Gah, I can’t believe it’s been a month already since the last blog post! It’s been a frustrating time to be honest. I’ve been planning on setting up a company for a while, to put GearBlocks on a more official footing (it’s something I should have done a long time ago really). The trouble is I’m having a hell of a time trying to think of a name for the company (all the ideas I’ve come up with seem to be already taken)! It seems ridiculous that a relatively trivial thing like this is holding me up, but hopefully I can figure it out soon and move on.
In the meantime I have made some progress with the game though. The Unity 5.6 upgrade is now done, the rendering issues I was having weren’t too bad to sort out in the end. Also, I was tired of having old placeholder part assets still left in the game, so I’ve finally removed / replaced / reworked the last of these.
These are the new seat models I’ve made so far, I plan on adding more types & variations of seat later (any suggestions welcome!)
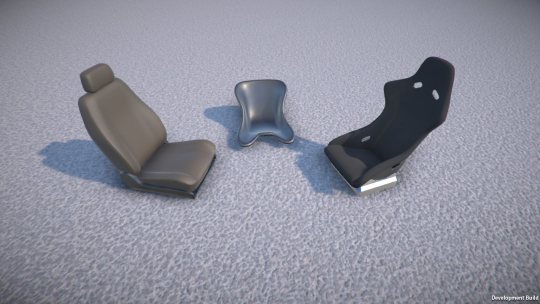
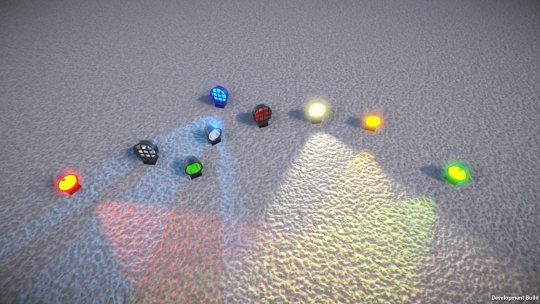
Here are the new lights (again, at some point I plan on adding more styles / types of light). Their lenses are now paintable, so you can have any colour lights you like!
It was a small change to make the wheel rims paintable too, so I decided to do that while I was at it.
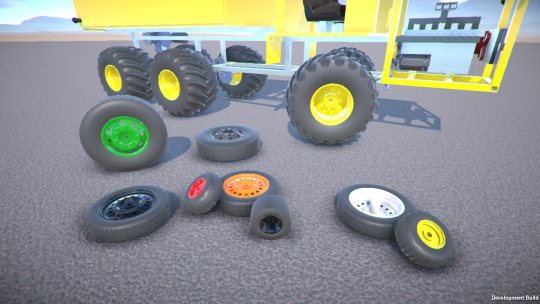
Well, the next demo release is pretty much ready to go now, it’s just waiting on me getting the company set up, as I want to have that all sorted first!
