Wheel physics revisited

Last week I decided to take another look at the wheel physics implementation, in particular the tire friction model.  First let’s quickly recap how the wheel physics works in GearBlocks.

Wheel physics recap

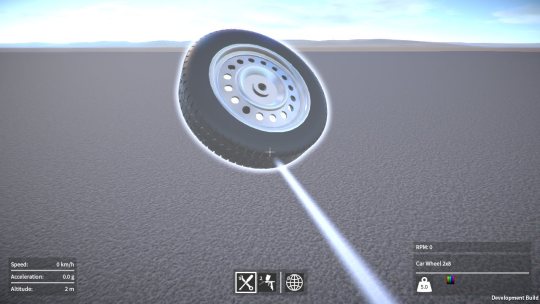
Every update I find the contact point on the ground directly below the wheel and position a configurable joint there.  This joint is then connected to the wheel at the closest point on its outer edge to the contact point on the ground.  The joint has a linear limit set up to prevent the wheel going below the ground, which provides the wheel to ground collision response.

For friction between the tire and ground, I set up the configurable joint’s velocity drive to constrain the wheel’s velocity at the contact point to zero, with the maximum force on the drive being set to the friction force.  To calculate the friction force, I use a method inspired by the Coulomb damping model, where the friction force equals the product of a friction coefficient and the normal force at the contact point (i.e the force preventing the wheel from sinking into the ground).

Previous tire friction hack

To find the normal force I need to know what force the configurable joint’s linear limit is applying to keep the wheel above the ground.  However, it used to be that in Unity there was no way to access this (even though it was available in PhysX), so I had to estimate the normal force by taking the total mass of the construction, dividing it by the number of wheels, and multiplying it by the acceleration due to gravity.  Basically a total hack, because it assumed the vehicle’s weight was always distributed exactly evenly over each wheel.

Improved tire friction

Well the good news is it turns out that fairly recently the joint force was made available in Unity (via Joint.currentForce), so I’ve now switched the implementation over to use this to find a proper normal force.  This means that in a vehicle, weight distribution now affects tire grip, and because the normal force is now being calculated dynamically, weight transfer also affects grip in the way you’d expect, which is pretty cool.  This all sounds great, and is a definite step in the right direction, but there’s a problem.

Formula magic

By using Coulomb damping I’m effectively assuming that tires are rigid (i.e. non-elastic) which of course they’re not.  In reality a tire’s grip changes depending on how much it is sliding across the ground (tires actually develop peak grip when sliding slightly).  Not only that, the longitudinal (forward and back) and lateral (side to side) grip of a tire behaves slightly differently.  So most driving simulations instead use some form of “friction curves”, equations that you plug slip amounts into and get friction forces out.  The industry standard is the Pacejka tire models, sometimes known as “magic formulas”, these are empirical models that have been made to fit real world measured data, the equations themselves don’t have any basis in real physics as far as I can tell.

Sounds simple enough, so why not use the magic formulas?  Well, after looking into this for a bit, I can see several problems:-

  1. The equations for the Pacejka curves themselves are complicated and have a ton of tuning parameters, something I’d prefer not to have to deal with.  Probably overkill for what I need anyway.
  2. The slip values used to lookup into the curves are actually slip ratios.  The upshot being that at low velocities numerical instability becomes an issue (and at zero velocity you’ve got a divide by zero – the slip ratio is undefined!)
  3. Because you need to evaluate longitudinal and lateral slip separately, there’s the question of how to combine the resulting separate friction forces.  You can’t just add them together because a tire can only develop so much grip at any one time, the more longitudinal grip you “use up”, the less lateral grip is available, and vice versa.  This effect is sometimes known as the tire’s “traction circle”.

I’m sure there are ways around all of these problems.  The Pacejka equations could be substituted with something simpler for example, and I’ve seen various ideas out there that attempt to properly combine longitudinal and lateral slip.  The slip ratio numerical instability issue I’m less sure about at the moment, apparently a lot of driving sims switch to another simpler friction model at low velocities to get around it, seems a bit hacky though.

Another related issue is that I’m not even differentiating friction levels between different surfaces (e.g. tarmac vs. dirt) yet, so perhaps a realistic tire friction model isn’t worth it at this point?  Anyway, something to keep thinking about and revisit again in the future.
Construction controls (again), and props

Selection points

Over the last few weeks I’ve been working on fixing something with the construction controls that’s been bugging me for ages.  I wasn’t happy with the range of positions at which you could select a part, you could select it anywhere within its bounds, which wasn’t really restrictive enough.

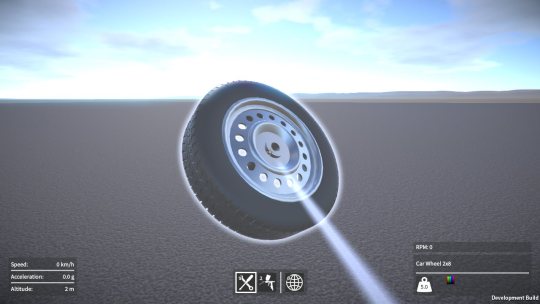
Here’s an example.  You could select anywhere on a wheel, even though it only has one point that can attach to anything.

image

Much better to restrict the selection point to always be at this attachment point as shown below, that way it feels more natural when attaching the wheel to another part.

image

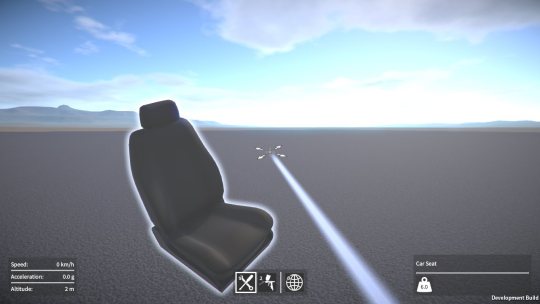
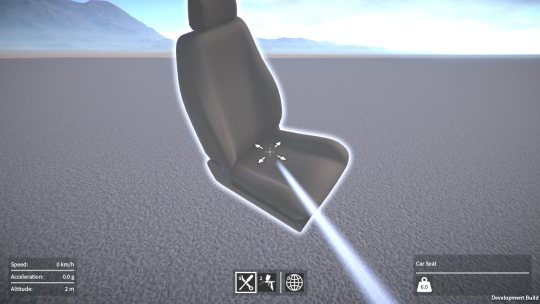
This next example is even worse.  You could select anywhere on a seat, and then translate it so that the selection point was completely outside the seat which is just plain stupid.

image

So now I restrict the selection point to be somewhere in the region on the bottom of the seat where its attachment points are, so you always have it selected in a suitable place ready to attach to another part.

image

To accomplish this I had to rework some code so that it now automatically calculates the selection region based on where all the part’s attachment points are located.  The upside to this was that I could do away with explicitly specifying the allowed translation directions on each part.  The less I have to manually setup per part the better!

I also had to implement some new math functions to find the closest point on the part’s selection region to the player’s eye “ray”.  Took a while to do, but it’s never a bad thing to add more stuff to my math toolkit I suppose, could come in handy for other things in the future.

All this took way longer than I expected, it was only supposed to be a couple of day’s work, sigh.

Prop parts

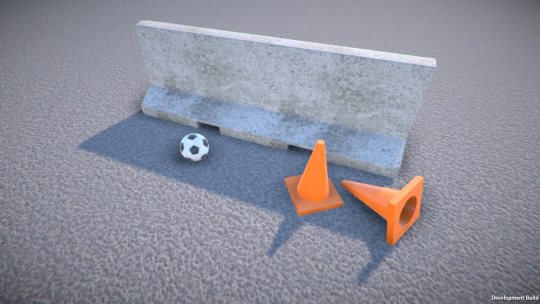
I’ve also added some new “prop” parts.  Props are a new category of part that are the simplest objects in the game, they don’t have a behaviour and they don’t attach to any other part.  The idea is that they can be used with the machines and vehicles you build or placed in the world to set up a scene to play in.  For example, traffic barriers could be laid out to form a race track, the ball could be used in a Rube Goldberg machine.

image

As with all the other parts, I’ll be adding more props as I go, any suggestions for these are welcome!

What’s in a name

Gah, I can’t believe it’s been a month already since the last blog post!  It’s been a frustrating time to be honest.  I’ve been planning on setting up a company for a while, to put GearBlocks on a more official footing (it’s something I should have done a long time ago really).  The trouble is I’m having a hell of a time trying to think of a name for the company (all the ideas I’ve come up with seem to be already taken)!  It seems ridiculous that a relatively trivial thing like this is holding me up, but hopefully I can figure it out soon and move on.

In the meantime I have made some progress with the game though.  The Unity 5.6 upgrade is now done, the rendering issues I was having weren’t too bad to sort out in the end.  Also, I was tired of having old placeholder part assets still left in the game, so I’ve finally removed / replaced / reworked the last of these.

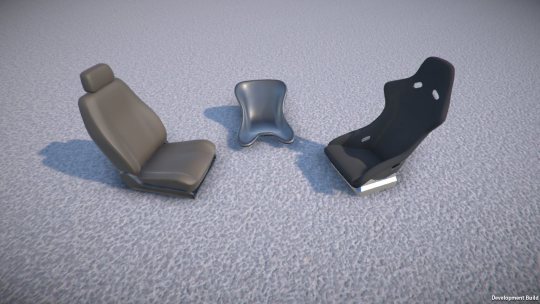
These are the new seat models I’ve made so far, I plan on adding more types & variations of seat later (any suggestions welcome!)

image

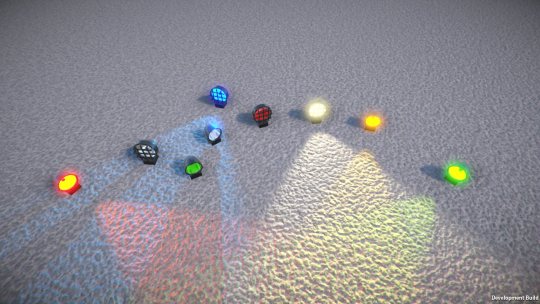
Here are the new lights (again, at some point I plan on adding more styles / types of light).  Their lenses are now paintable, so you can have any colour lights you like!

image

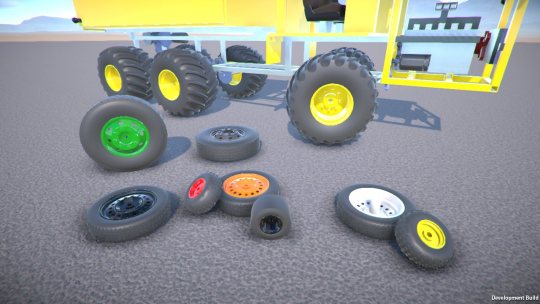
It was a small change to make the wheel rims paintable too, so I decided to do that while I was at it.

image

Well, the next demo release is pretty much ready to go now, it’s just waiting on me getting the company set up, as I want to have that all sorted first!

Controls, configuration, and more

Here’s just a brief update on what I’ve been up to over the past few weeks.  Most of the work has been focused on further improving the usability of the game (better UI, controls, customisation, etc.)

Construction controls improvements

I’ve redone the part resizing input code so that now when you press a resize key it responds immediately (before it was kinda sluggish to respond).

I’ve also made a tweak so that you can now freeze the selected construction in place while aligning to another construction, this can be useful to check positioning and so on before committing to attachment.

Configurable key and mouse button bindings

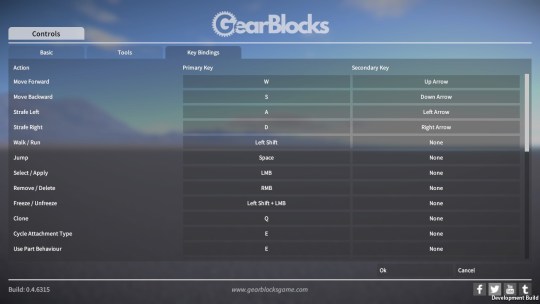
The main thing I’ve been working on recently is a complete overhaul of the input system.  You can now fully customise key (and mouse button) bindings to the various actions in the game.  There’s now a new tab in the controls settings where you can set this up.  You click the button for the action you want to configure, it’ll then wait for a key press, that key then getting bound to the action.

image

I’ve also modified the player controllable parts (e.g. motors) that have configurable key binding to work in the same way.  This means you can now bind any keys to them, not just letters and numbers.

The only thing still left to do here is to allow configuration of joystick / controller inputs, something I’ll revisit at a later date.

Improved graphics settings

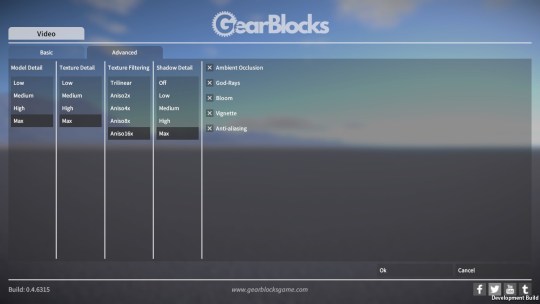
The other customisation improvement I’ve made is to the graphics settings.  I’ve done away with the (vague and too high level) “quality settings”, and set up proper options that’ll give you more fine grained control when configuring the graphics quality vs. performance of the game.

image

Other things

Some other bits and pieces I’ve also done:-

  • More UI design tweaks and improvements.
  • Better audio mix, updating sounds, etc.
  • Various bug fixes.

I’m working hard on getting another demo release out so that you can try all this new stuff out.  Unfortunately there always seems to be something that gets in the way!  Currently I’m in the middle of upgrading to Unity 5.6 which has broken some rendering stuff, so that’s what I’m working on right now, hopefully I’ll get this sorted soon.

More UI things

Over the last couple of weeks I’ve done some more work on the in game UI.

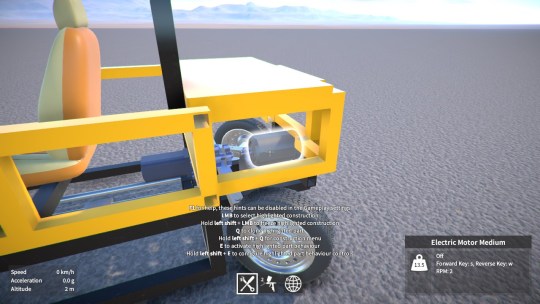
I’ve removed the old text overlay that showed the name of the highlighted part, as it was positioned near the cursor and kind of in the way.  Now I have a new overlay in the bottom right corner that shows not only the part name, but other details such as its mass, whether it’s paintable or resizable, and info on its behaviour status.

image

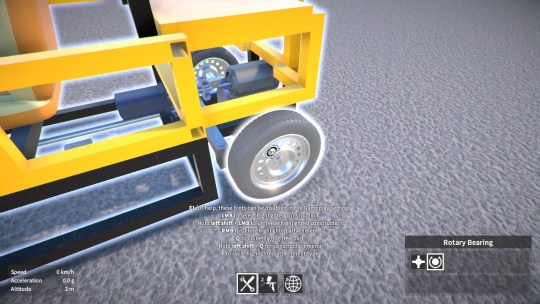
I’ve also added a similar overlay for when you’re hovering over an attachment in a frozen construction.  It displays the available attachment types that you can cycle between (highlighting the current attachment type), and it’ll also show info on other things like attachment integrity (if damage is enabled).

image

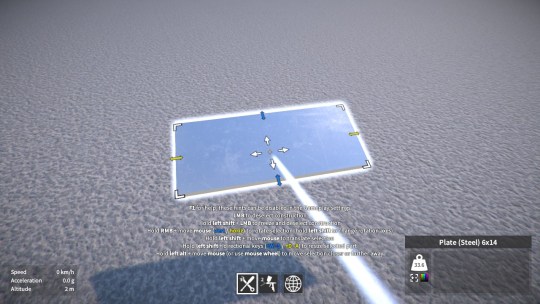
During part resizing, rather than add yet another UI display to show which keys to use

to resize in each direction

(as I was originally thinking), I decided instead to just colour code the relevant parts of the hints text.

image

Finally, to help the new UI elements fit, and clean up the look of the UI generally, I’ve also made the whole thing scale based on the screen dimensions.  This means that (in full-screen mode), the UI elements appear the same size regardless of the screen resolution.  I think this is a big improvement, especially at lower screen resolutions.